- Help Center
- Classes
- Class List Manager
-
Frequently Asked Questions
-
Teacher User Guides
-
Assessments
-
Timetabling
-
P-POD
-
Guides for Parents
-
Guides for Students
-
School's guide to Parent Accounts
-
VS-Mail
-
Student Profiles
-
Attendance
-
Passwords and Security
-
Principal and Secretary Profiles
-
Teacher Profiles
-
Groups
-
Behaviour
-
Classes
-
Classroom Based Assessment
-
DTR Returns - September Returns & Subject Codes
-
Fees
-
Mailing Labels
-
Settings
-
SMS
-
Supervision & Substitution
-
Subject Options
-
QQI
-
Office365
-
Unpublished, temp folder
-
Exams
-
AEN and Medical
How to create a block in Class List Manager (read time less than 2 minutes)
The first step to create a block is to visit 3 lines > Current Timetable > Teaching Groups. In Teaching groups, you can select the year you want to create your block, e.g. 3rd Year.
Here, you will see a number of columns, including the block column. In this column, you will specify the name of your block.

In the above picture, you will see your teaching group screen, the teaching group you are editing, your block column and the name/number of the block you have created.
Blocks can be edited at anytime by clicking on the edit pencil button beside the teaching group in question.
Once you have inputted the name of the block you have created e.g. 'Block 1', you can go ahead and save the changes you have made by clicking update.
To see your completed work, you can go to the class list manager window (3 lines > current timetable > class list manager).
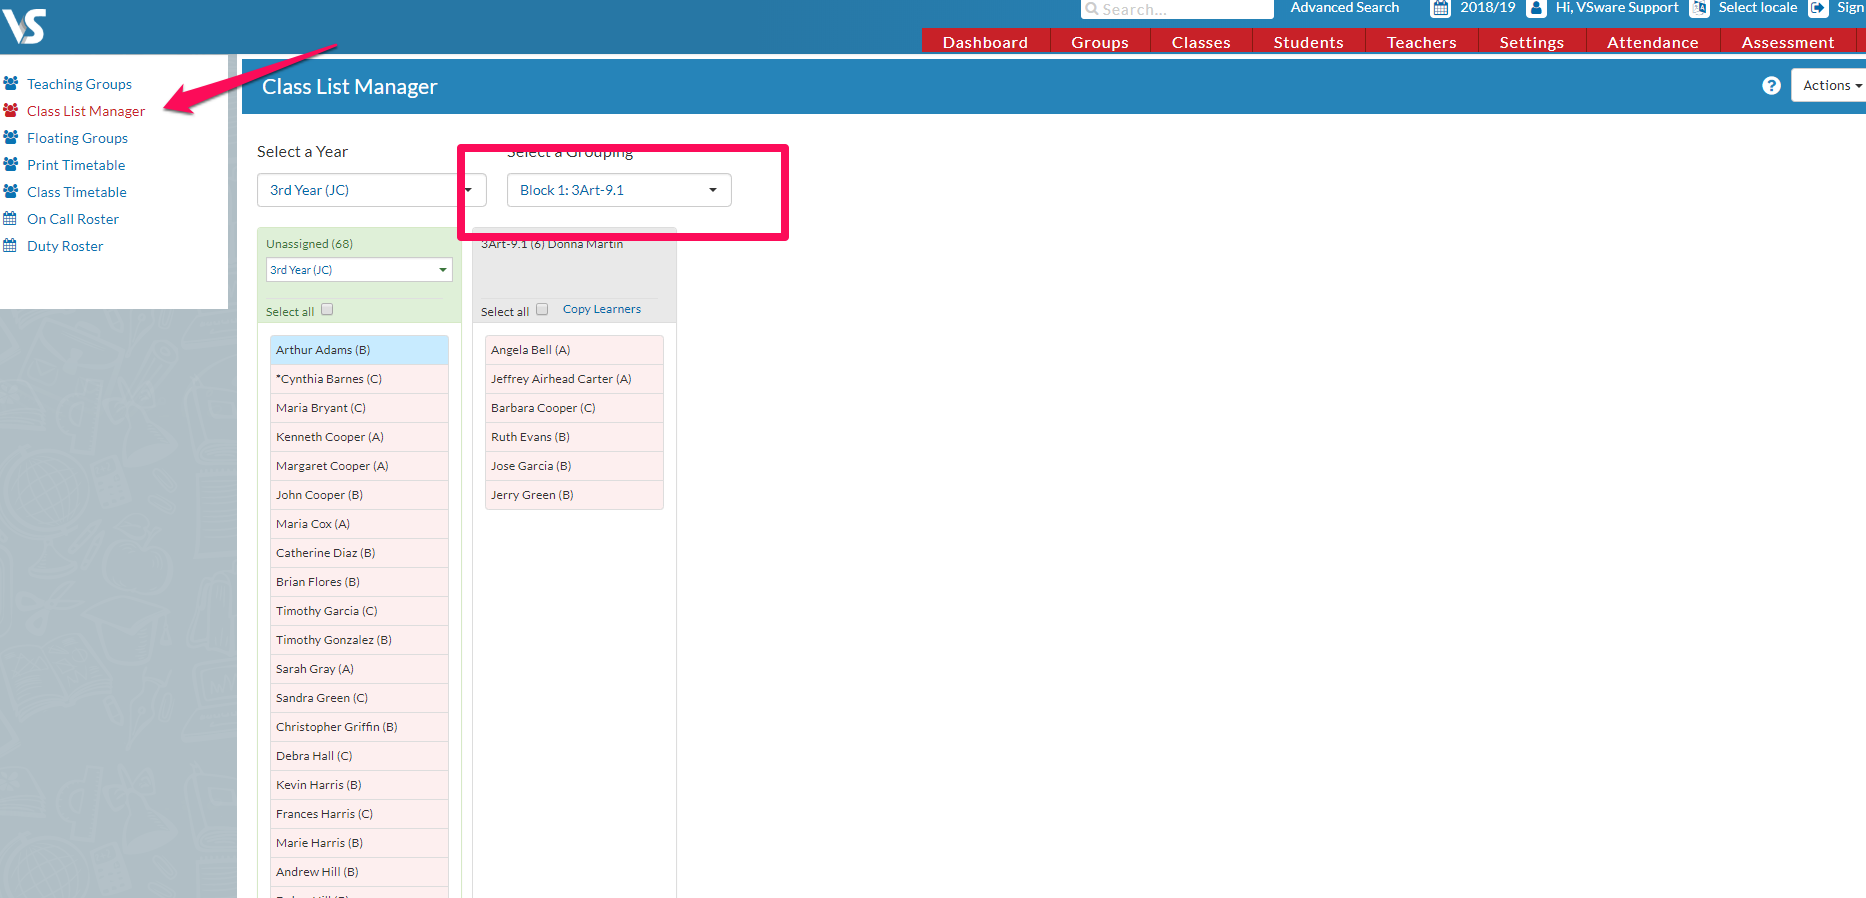
In this class list manager window you can see the selected year: 3rd year and the specified block: Block 1: 3Art-9.1
Both of these options are found using the drop-down menus 'Select a Year' and 'Select a Grouping'.
Therefore, your block column was successfully created and is now visible.
If needed, you can now add students to the teaching group within your block. The class lists of this block are always editable within this screen.