How to edit the timetable grid. This article is intended for Admin. (Read time: 1 minute).
 Step 2 of Timetable Construction is where you can edit the length and number of timetable periods or lessons in your school's weekly timetable. You can also manually add short morning roll call/pastoral care periods to the grid on this screen.
Step 1
Go to the Admin > Timetable Construction > Select the file > Select 'Step 2, Grid'. This will display the existing timetable grid and presents you with an opportunity to edit it according to your needs.
Step 2
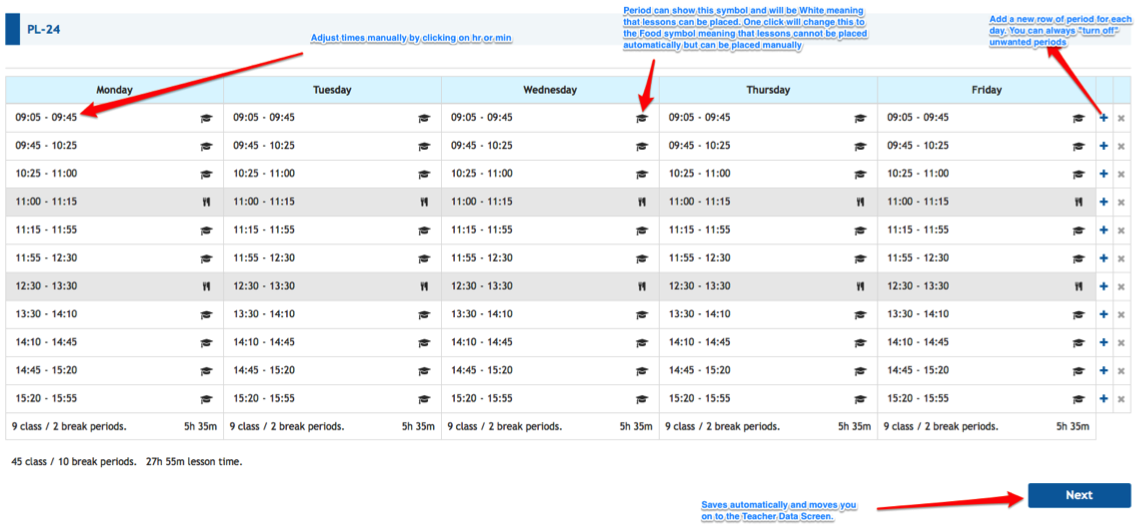
Each cell on the grid can be made a 'Class' or 'No Class' period by clicking on the icons it to change the colour to either white or grey.
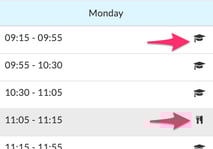
White cells with the academic hat icon - mean that the period is a 'Class' period and open for teaching groups to be allocated to it. Lessons will be placed here when you run your timetable later.

Grey cells with Knife and Fork icon - mean that the cell is a 'No Class' period and will not have any teaching groups allocated to it, for example a lunch periods. If you have a half day, you can also use the Knife and fork icon to make those periods inactive. Lessons will not be placed here when you run your timetable later.

Note: technically, lessons could be placed on these 'inactive' grey cells manually later on (using make editable in the teacher’s timetable) after the timetable is completed.
Step 3
If your school has a half day, you must define at what point the 'Half Day' commences. This is done by dragging and dropping the red line on the grid. These can be the same or different for each day.
Step 4
If pastoral care or a short roll call period at the start of the day needs to be added to your schedule, you can manually place these on the grid prior to construction in order to prevent ‘normal’ lessons from taking these specialised slots.
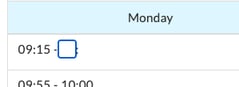
Click the plus button on the right hand side of the grid > select the type of period to be added and the length (these are usually 5-10 min slots) > click into the time directly on the grid to manually change the hours and minutes if needed.
The total number of lessons at the bottom will change accordingly.
For further information on teacher allocations within the grid, click here.
If you still have questions, please visit our knowledge base at support.vsware.ie. You can contact our support team via email at support@vsware.ie, via the chat bubble when you are logged into your VSware account or via phone on 01-5549628. Support hours are Mon - Fri, 08:30 - 18:00.