How to stagger breaks to maintain social distancing in Timetable Construction. (Read time: 2 minutes).
Last updated: 18/07/2022
Staggered breaks are a tool that can help manage the flow of students throughout a school. There are a number of ways to approach this which we have outlined below.
Step 1
Housekeeping
There is no optimal staggered start time that we can recommend, it will be down to what suits each individual school.
The more doubles that are requested on a timetable the more difficult it will be to solve. While perhaps not impossible to complete the scheduling, you may find that it might be impossible to actually contain all of the requested doubles on the timetable grid. Most grids will only allow 14 doubles to be scheduled. If a teacher has more doubles than this they will have to be 'spread breaks' where the 'double period' will need to stretch over the morning break or the lunch break or perhaps have two separate periods on the same day.
The measures described below will be restrictive, for example if using two grids, teachers who take both senior and junior cycles will be scheduled on both grid and as there will most likely be a 15 - 20 mins offset between the two grids, there will be occasions where a teacher will be free for a 15 - 20 min period.
Step 2
Dual Grid System
One method you might employ is the implementation of a second grid, possibly one for
junior and one for senior cycle. You may want to do this if you decide upon different start times for groups of students. To achieve this you must do the following:
> Go to screen 2. Grid
> Actions > Add Grid
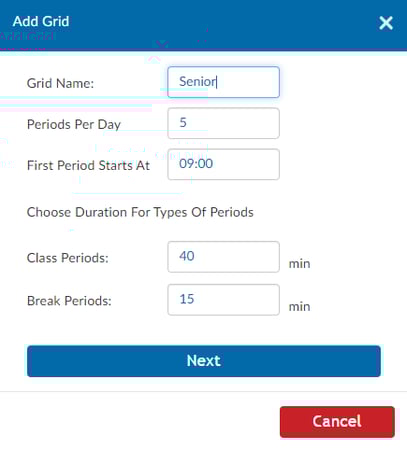
The box to the right will appear.
Set your grid name, number of periods, start time and period length before then pressing 'Next.'
The screen will then appear as below: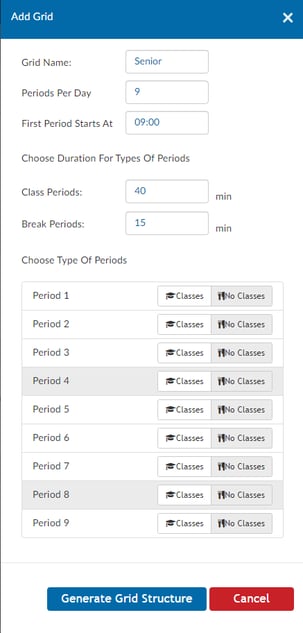
Set your break and open periods and then click 'Generate Grid Structure.' You will now have a second grid on your screen. You now select which grid applies to which year groups.
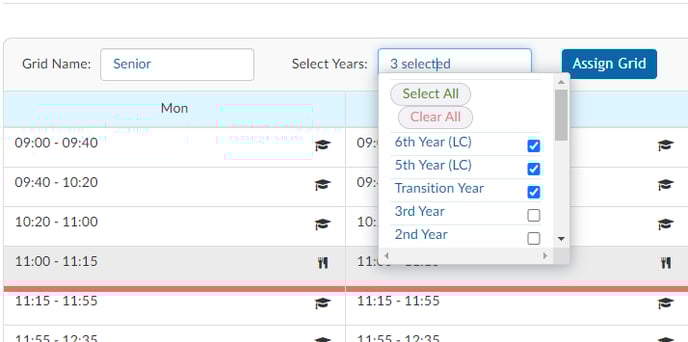
You do this by clicking the 'Select Years' box and then ticking beside each applicable year before then hitting Assign Grid.
Below is a sample for a two grid system with Junior Lessons on one grid and Senior Lessons on the second grid.
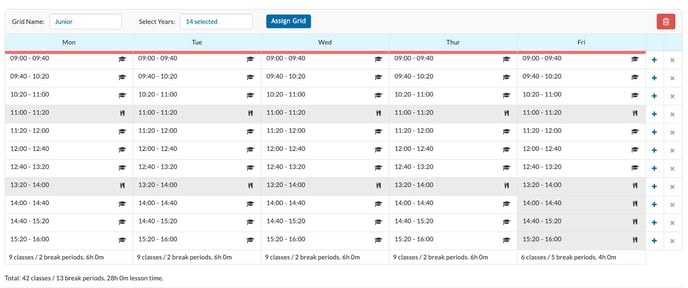
You can see that the seniors take their morning break at 10:20 until 10:40 and then complete their 40 mins lesson (10:40 - 11:20). Whereas the junior students have a 40 mins lesson (10:20 - 11:00) followed by their break. This means that both groups are then ready to begin their 4th lesson of the day simultaneously at 11:20am.
The seniors will take their lunch break from 12:40 - 13:20 and the juniors will take their lunch break from 13:20 - 14:00.
Step 3
Breaks & Lunches
Breaks & lunches for students are still added as normal on a dual grid, simply click the symbol to the right and set it to a knife & fork at the relevant times on both and this is enough for students.
To ensure that teachers receive a lunch break you must take further steps. You first go to screen 7. Construction followed by Actions > Restrictions. A box will appear as seen below.
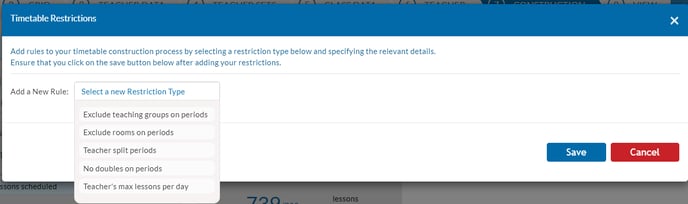
To add the restriction click Select a new Restriction Type > Teacher split periods.
First click the empty Teachers box and choose the teachers to whom the restriction will apply. For handiness sake you can click Select all. Once teachers are selected simply click Select Period(s) to proceed.
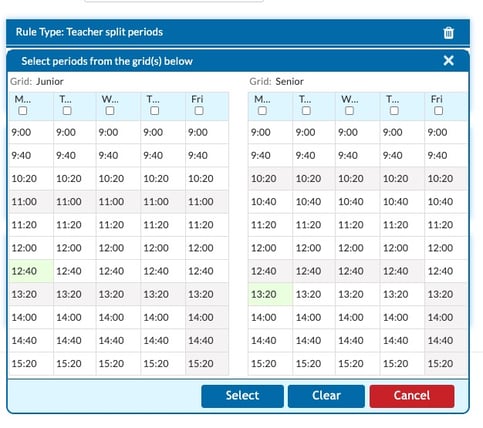
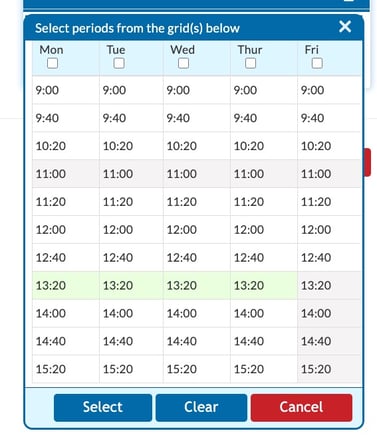
Simply click on the periods that the teachers can potentially take off (they will turn green and a minimum of 2 must be selected). Press Select when done.
NB: The solver will choose ONE period per restriction so it is vital that you set one restriction for each day of the week and do not try to include them all at once.
Once you have it all set up it should look something like this:
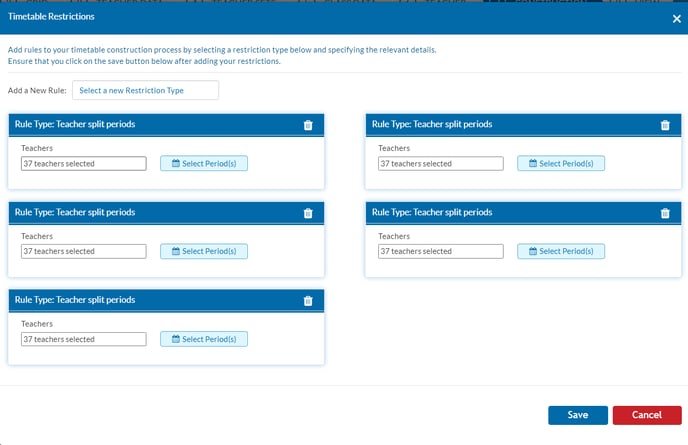
The solver will now ensure that the teacher has one of the selected periods off for each day of the week.
Step 4
Single Grid System
If you are going to operate with a single grid it is possible to stagger lunches for students provided that the lunch period is the same length as a class period. It will not be possible to stagger the small break however as the period length is inconsistent.
Step 5
Lunches
If you are going to stagger lunches on a single grid you must leave the time slots open ie you cannot use the knife & fork to designate lunch time and instead need to make use of restrictions.
For teachers you follow the exact same process as outlined above regarding Teacher split periods. For students you use the Exclude teaching groups on periods restriction. This only needs to be done once for each group of students.
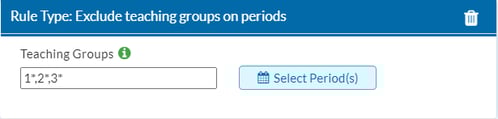
The above restriction will ensure that all junior students can have no lessons scheduled from 13:20 - 14:00 and this period will be their lunch period. 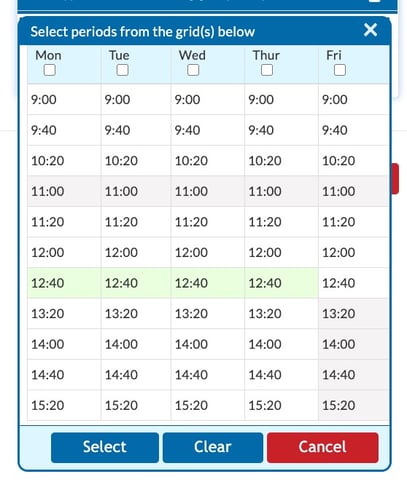
The above restriction will ensure that all senior students can have no lessons scheduled from 12:40 - 13:20 and this period will be their lunch period.
Step 6
Rooms
If you wish to manually assign rooms this is still best done on the class data screen by clicking the edit pencil beside a teaching group and selecting a room from the dropdown menu. It is still best to leave assigning the bulk of your rooms until after the file has generated.
There isn't a way to tell the solver to give a specific room to a specific base group at all times.
If you still have questions, please visit our knowledge base at support.vsware.ie. You can contact our support team via email at support@vsware.ie, via the chat bubble when you are logged into your VSware account or via phone on 01-5549628. Support hours are Mon - Fri, 08:30 - 18:00