How to set up the calendar, add and assign a day type. This article is intended for Admin. (Read time: 1 minute).
Last updated: 19/08/2025
Term dates can vary from school to school, so it is up to each individual school to set up their own calendar each year. These steps are an important part of the timetable publishing process because without them, your new timetable will not be visible to staff, parents or students. .
Once you have published your timetable and moved forward the academic year forward, you can then do the following:
- Set up term dates
- Create an additional day type for a school closure
- Make edits to day types if needed, eg. edit the bell times (Remember: Monday to Friday day types will automatically appear in your calendar after you publish your file)
- Apply these day types to specific dates on your calendar
Step 1 - Setting up term dates
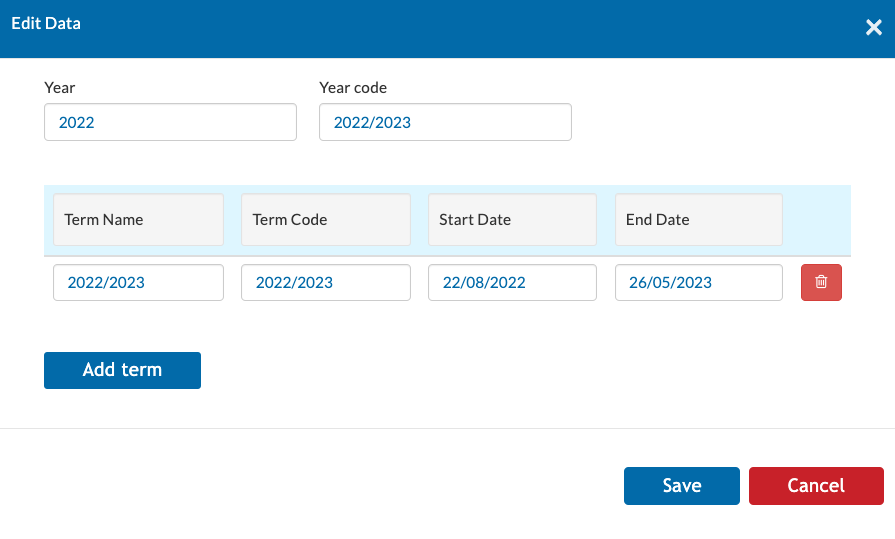
Go to Settings > Timings > Academic years > go to 2022/2023 (i.e. the upcoming academic year) > Click on the edit pencil: 
Click ‘Add term’ > give it a name and a code (e.g. FY for full year) and specify the start and end dates for the term.
Some schools just record one term from the first to the last day of school in that academic year. If you skip this step then you will not be able to set up your calendar.
Where does the next academic year come from in the first place?
The next/upcoming academic year is automatically created when you do your PPOD roll over, so it should be there for you already. You should not create your own academic year manually for the purposes of checking your timetable as this might cause issues further down the line. For more information on how how the P-POD roll over/progression and sync fits into the timetable publishing timeline, click here.
Step 2 - Create an additional day type for a school closure
You are now able to create a 'school closure' day type yourself, without contacting support (via Settings > timings > day types > actions > create school closure day type). It is advised that you only create one school closure day type as multiple versions can create confusion.
Step 3 - Make edits to day types
You are now able to edit existing day types yourself if necessary via the edit pencil beside each day type (under Settings > timings > day types). Please remember that you cannot create Monday to Friday day types as these appear automatically after the timetable is published but you can edit them.
Previously, you would have to contact support and ask them to edit these day types for you, for example if you wanted to set up a bell time. You can now make changes to these after your timetable is published and up until (but not including) the start date of next academic year. Any edits after this point must be carried out by support.
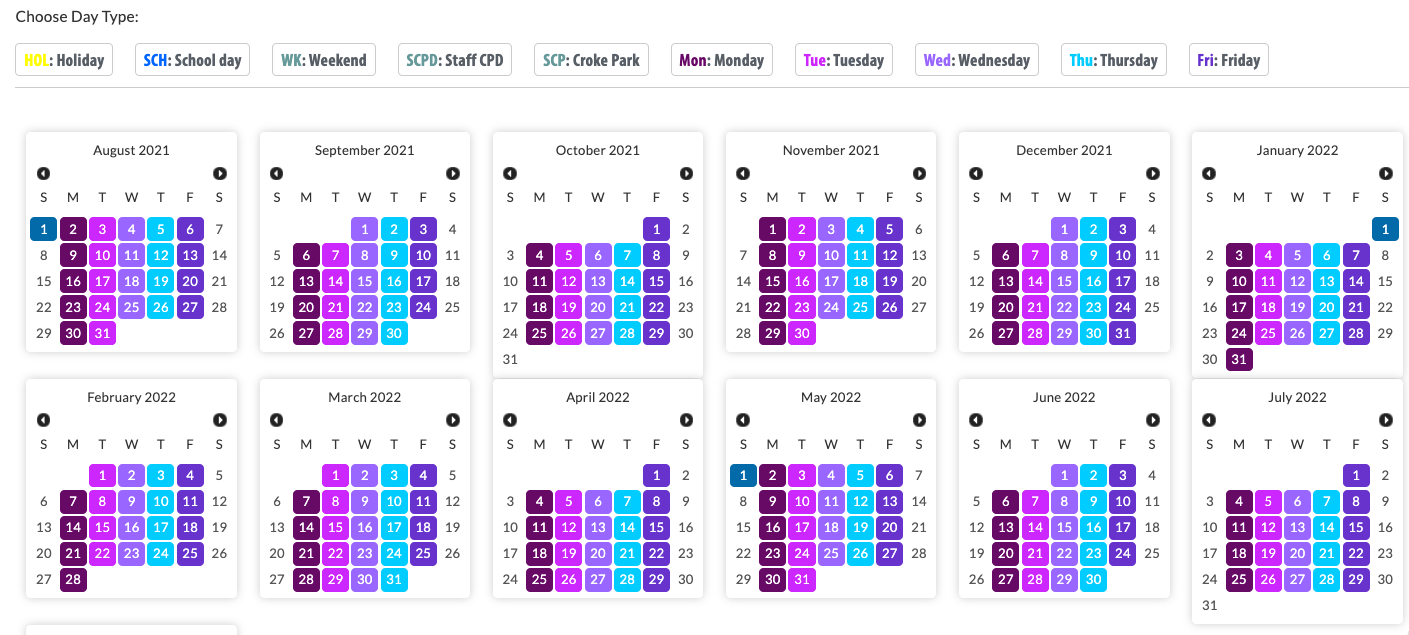
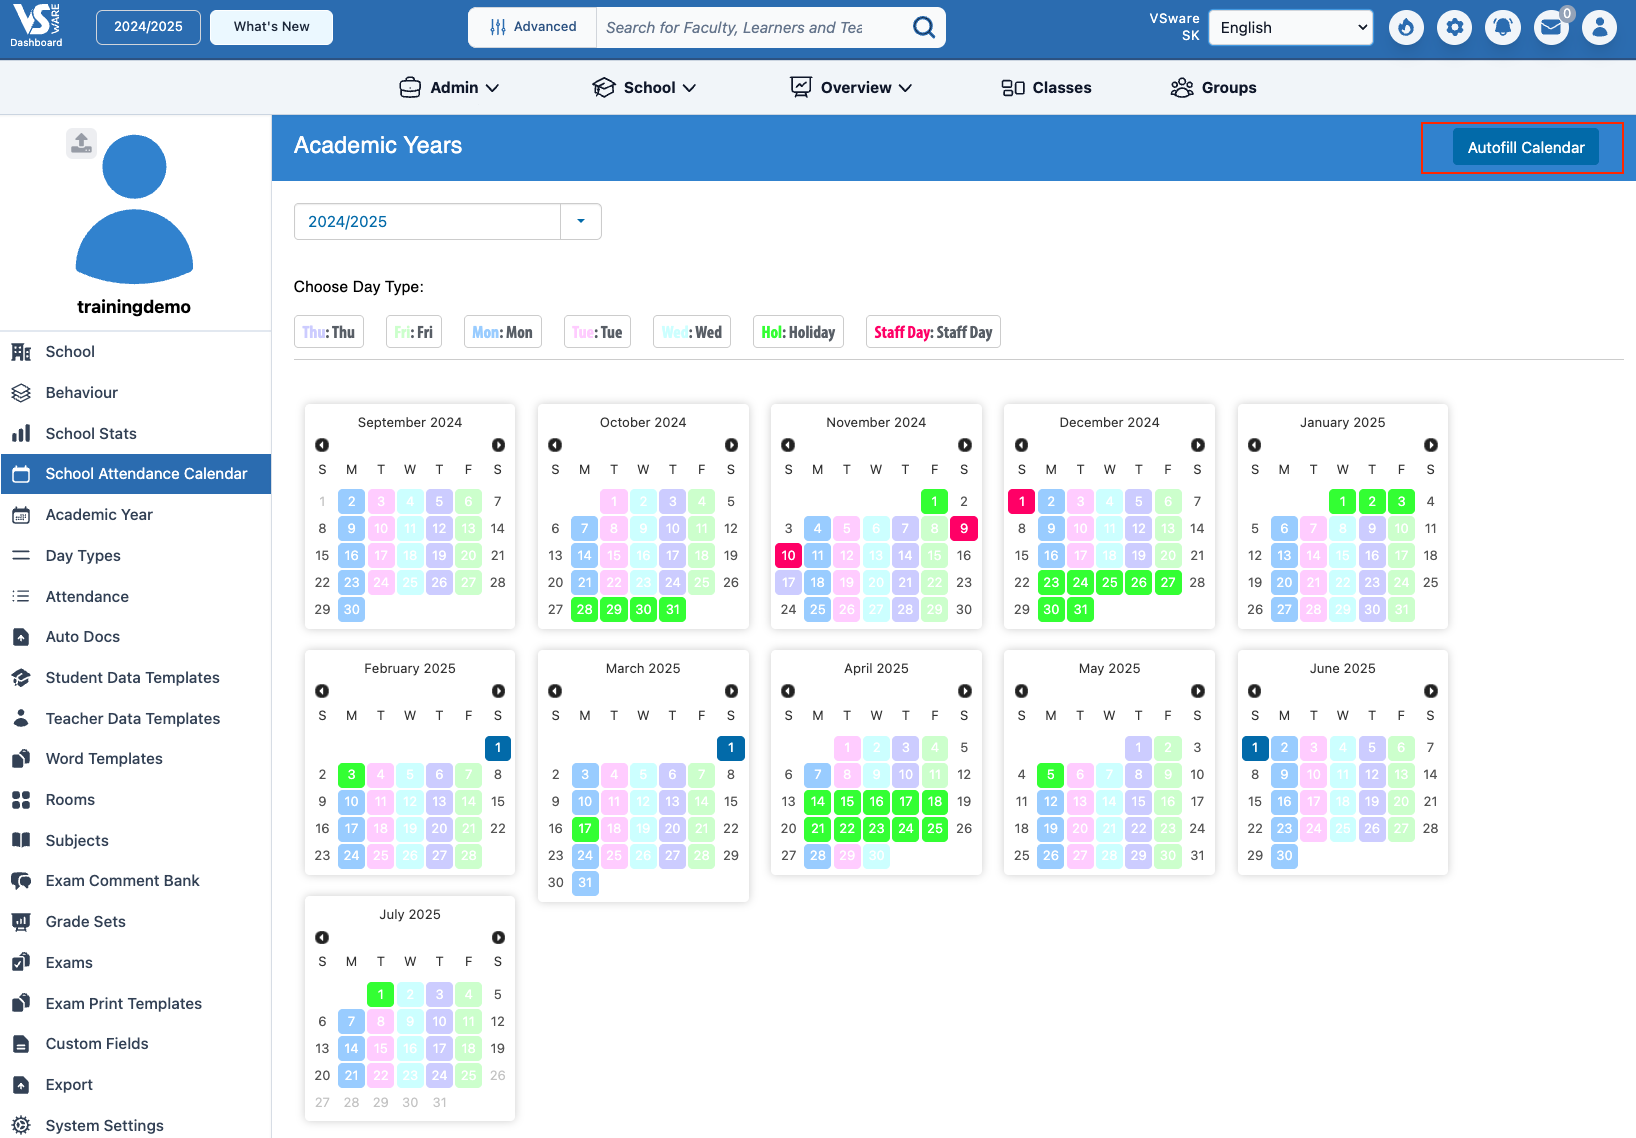
Step 3 - Assign Day Types to the calendar
Go to Settings > Timings > Calendar > make sure the upcoming academic year is selected in the drop down.

Click on the day type tab along the top, and click on the date you wish to apply it to. You can do this in bulk by clicking on the day of the week along the top. This will auto fill the vertical column below. Click 'Save' on the bottom right when the calendar is completed.
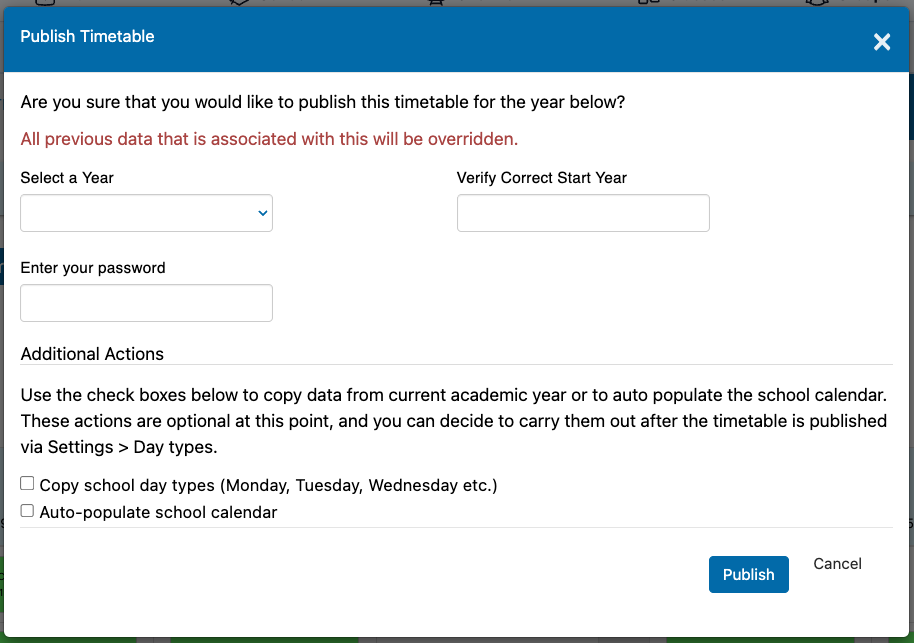
Copying Day Types from year to year
You can now copy your calendar day types and bell time settings from the previous academic year into your new academic year and automatically populate your school calendar. Previously, this was something you would have contacted support about, but now you can manage this yourself. This is available to do when you are publishing your timetable:
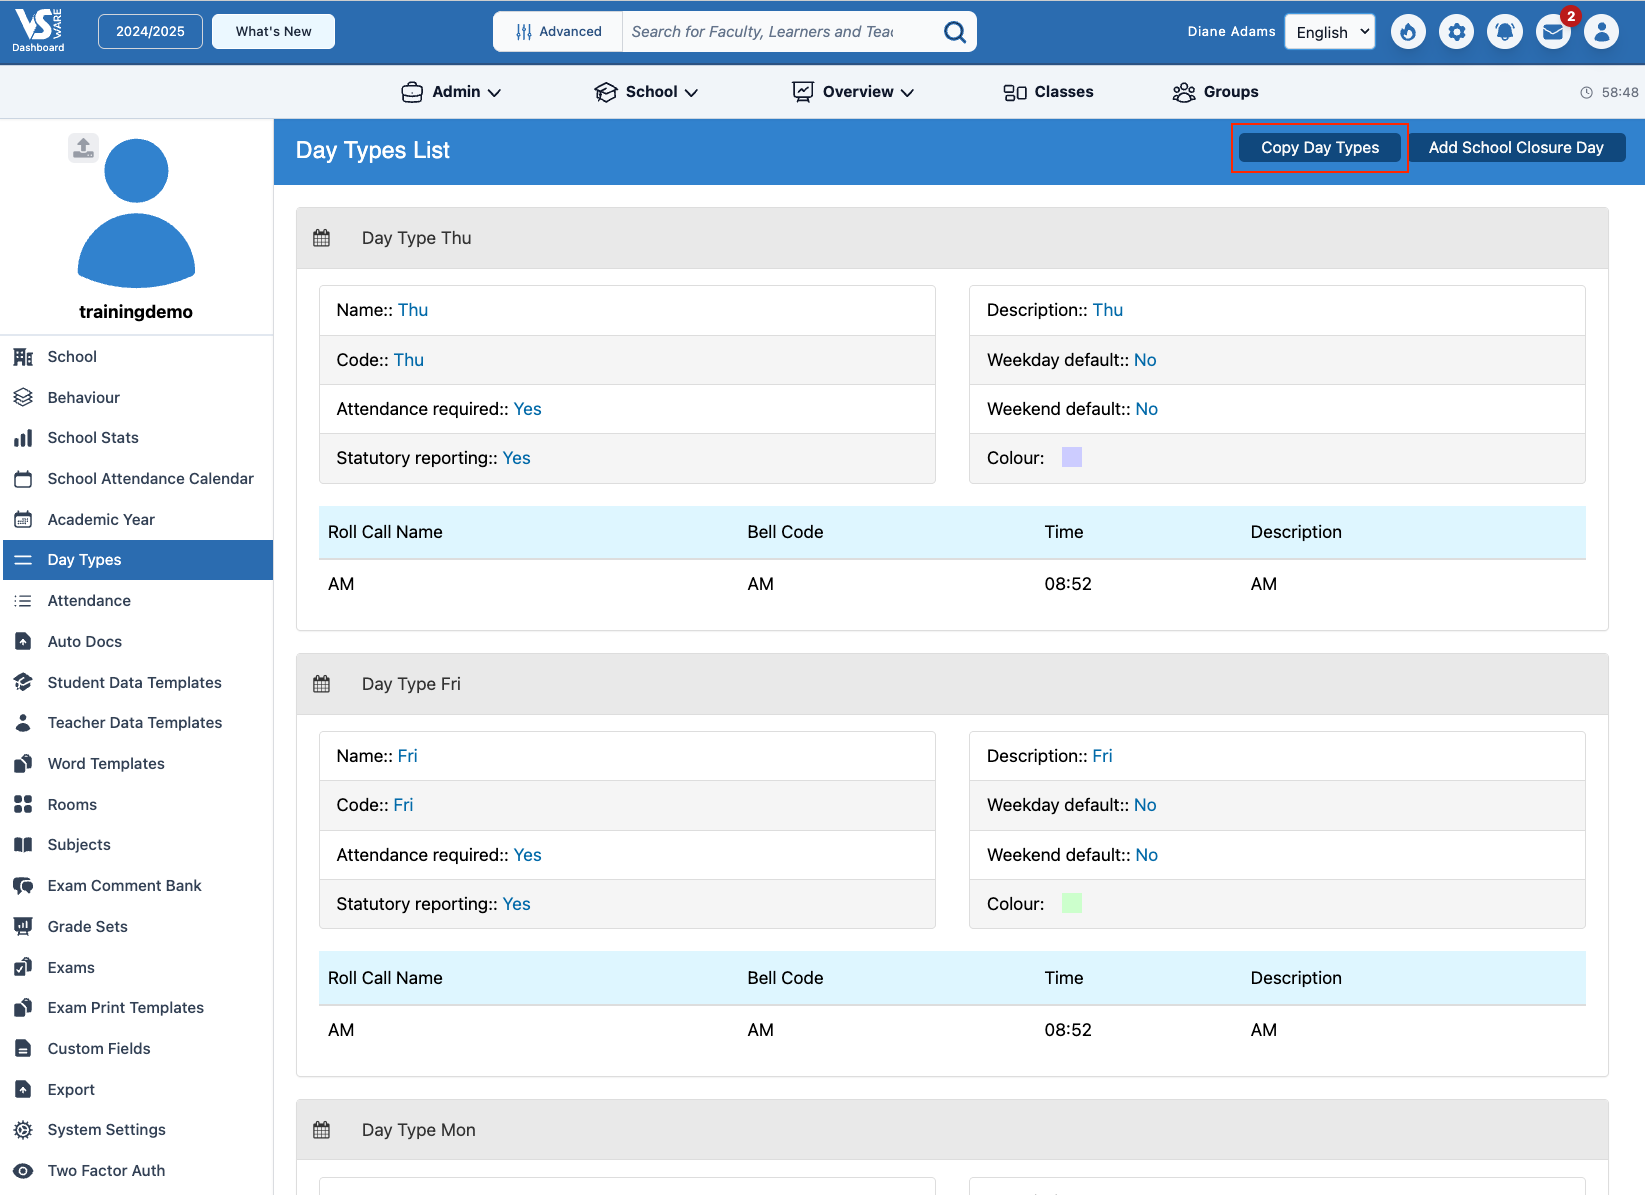
It is also available after you publish your timetable in Settings > Day Types to copy the Day Types over and in Settings > School Attendance Calendar > Autofill Calendar to place the day type onto the calendar:
If you still have questions, please visit our knowledge base at support.vsware.ie. You can contact our support team via email at support@vsware.ie, via the chat bubble when you are logged into your VSware account or via phone on 01-5549628. Support hours are Mon - Fri, 08:30 - 18:00.