How to add meetings to timetables using teaching groups. (Read time: 5 minutes)
We’ve recently updated our top menu navigation (July/August 2024). We’re currently updating our user guides to reflect these changes, so thank you for your patience while we work on this. The new menu is user-friendly, so you shouldn’t experience significant disruption. If you need help locating specific items in the new menu however, watch our quick videos for admin users here, and for teachers here.
Last updated: 21/07/2022
Meetings are an important part of school life and it can be very useful to include them in your timetable. To add meetings to your timetable you must use a work-around as there is no official subject called 'Meeting' available for use. Meetings are added by creating a single lesson teaching group specifically for meetings, scheduling it within a year group that is not used for students and then applying this to your Construction screen.
Watch the video below to learn more.
Caution: Meetings are restrictive and it is important to remember that teachers in attendance at meetings cannot teach their lessons at this time. This is particularly restrictive if any of the teachers in attendance have some of their lessons in blocks. This would of course prevent the other teachers in those same blocks from teaching their lessons at this time. Please do not add a large number of meetings as you will make your timetable much harder to complete.
Step 1
Go to Settings > Subjects from the main menu.
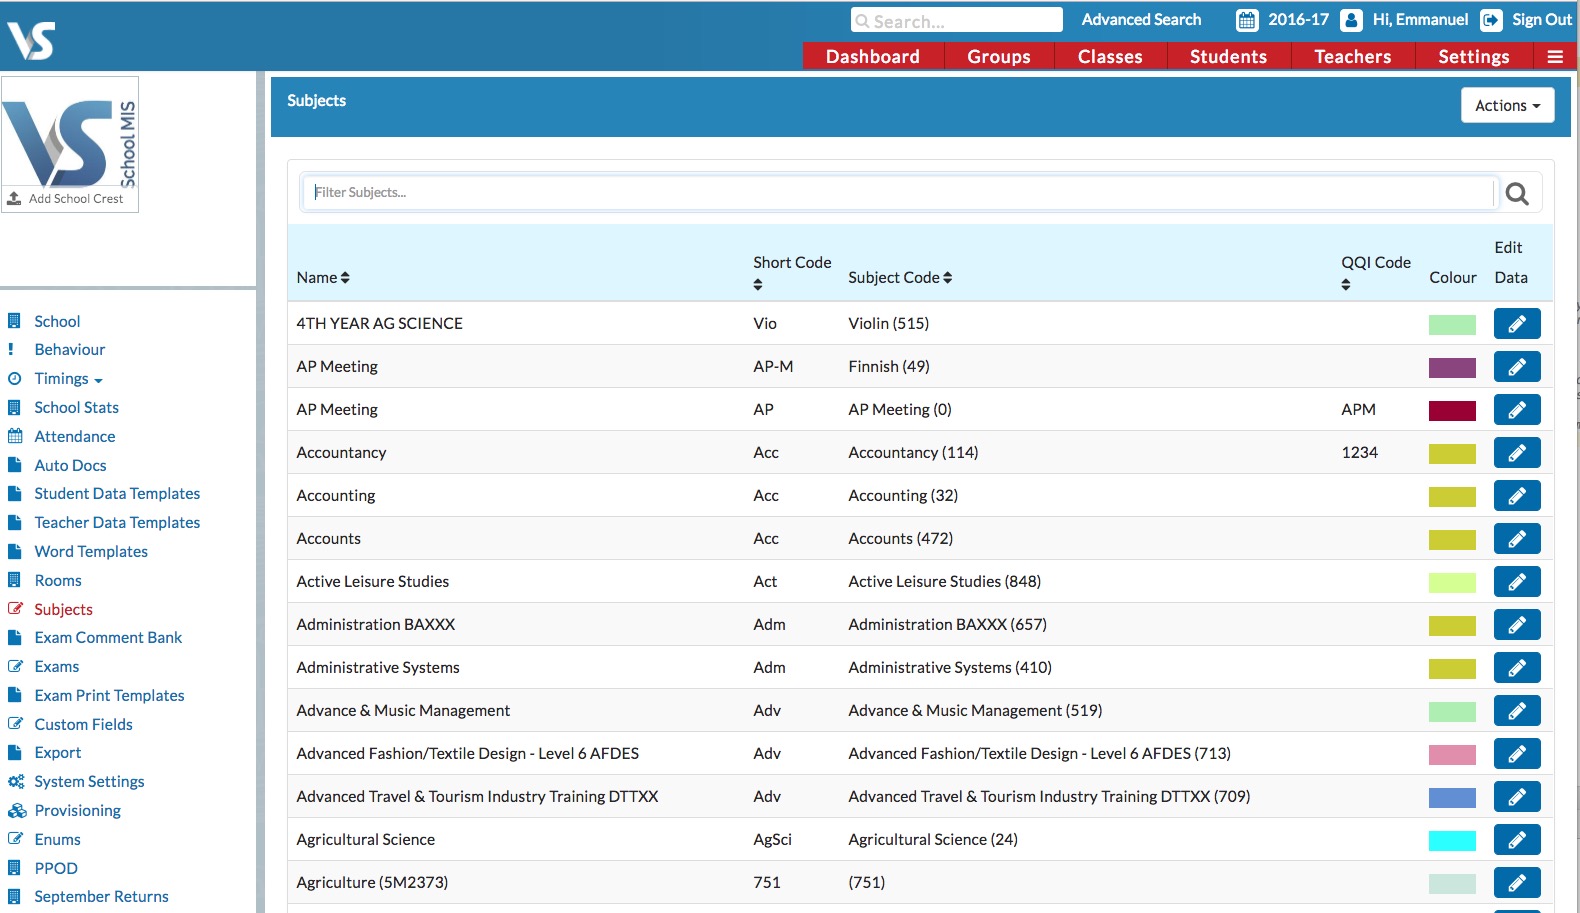
In the Filter Subject field, enter the name of a subject that you do not use in your school, for example: 'Typewriting'.
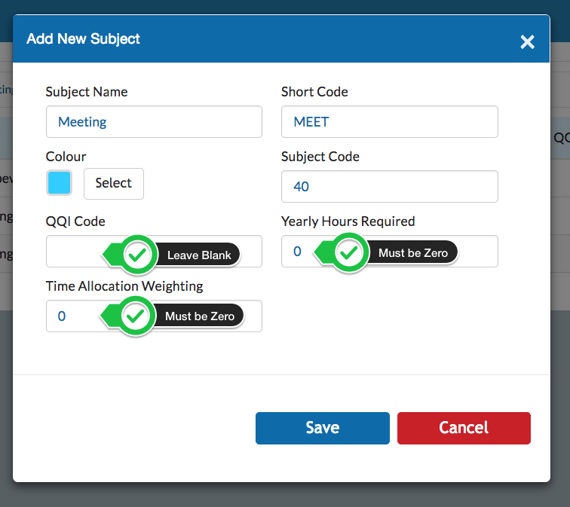
Change the Subject Name to 'Meeting' and the Short Code to 'MEET' as in the screenshot above > Leave the QQI field blank, and the Yearly Hours Required and Time Allocation Weighting as 0 > Click Save.
If you wish also to add something like Pastoral Care time slots to the timetable, you can edit a subject in the same way described in Step 1, but change the Subject Name to 'Pastoral Care' and the Short Code to 'PC'.
Step 2
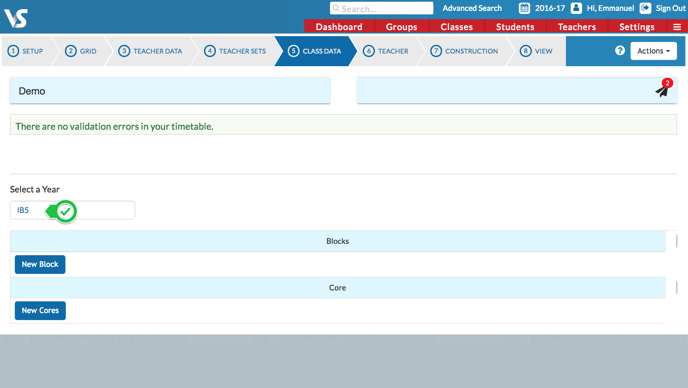
Click on the three lines > Timetable Construction > open the file you're working on > Go to Step 5, Class Data.
Under Select a Year, Select the a year group that your school is definitely not using, for example, that might be IB5.
Step 3
This year will have no data in it, so you must first select Actions > then select Add a Base Class.
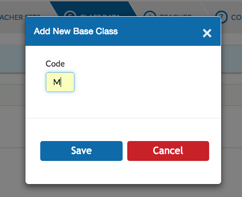
Ender 'M' for meeting as the code > Save. This will create a new base class called 12M.
 .
. 
Step 4
Select 'New Block' > click on the grey cell to add the teaching group 'Meeting'. 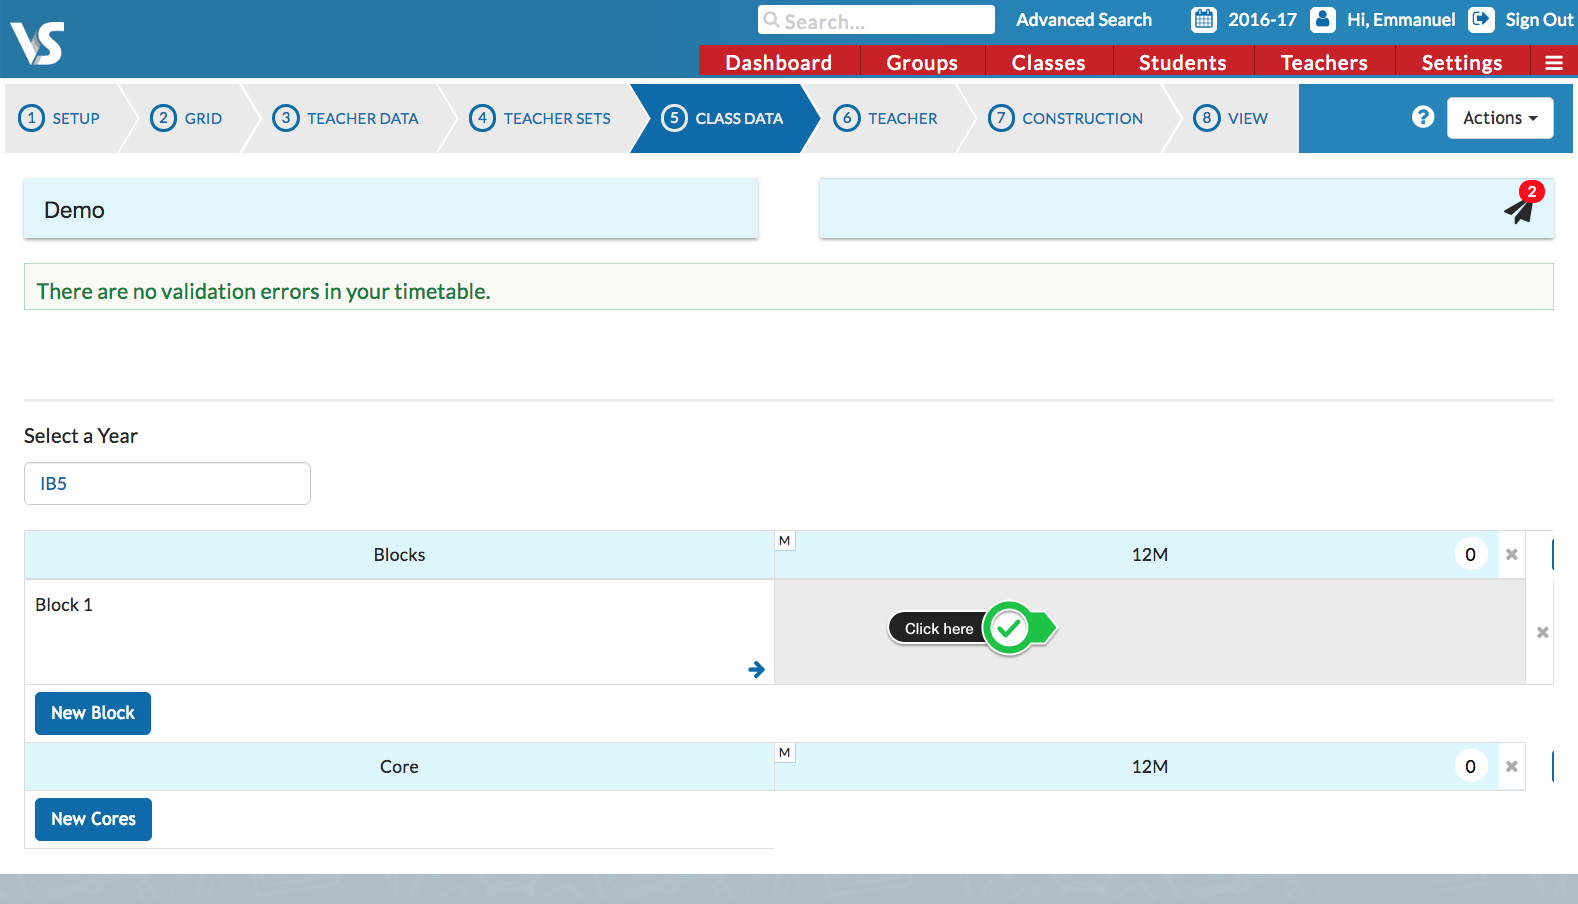
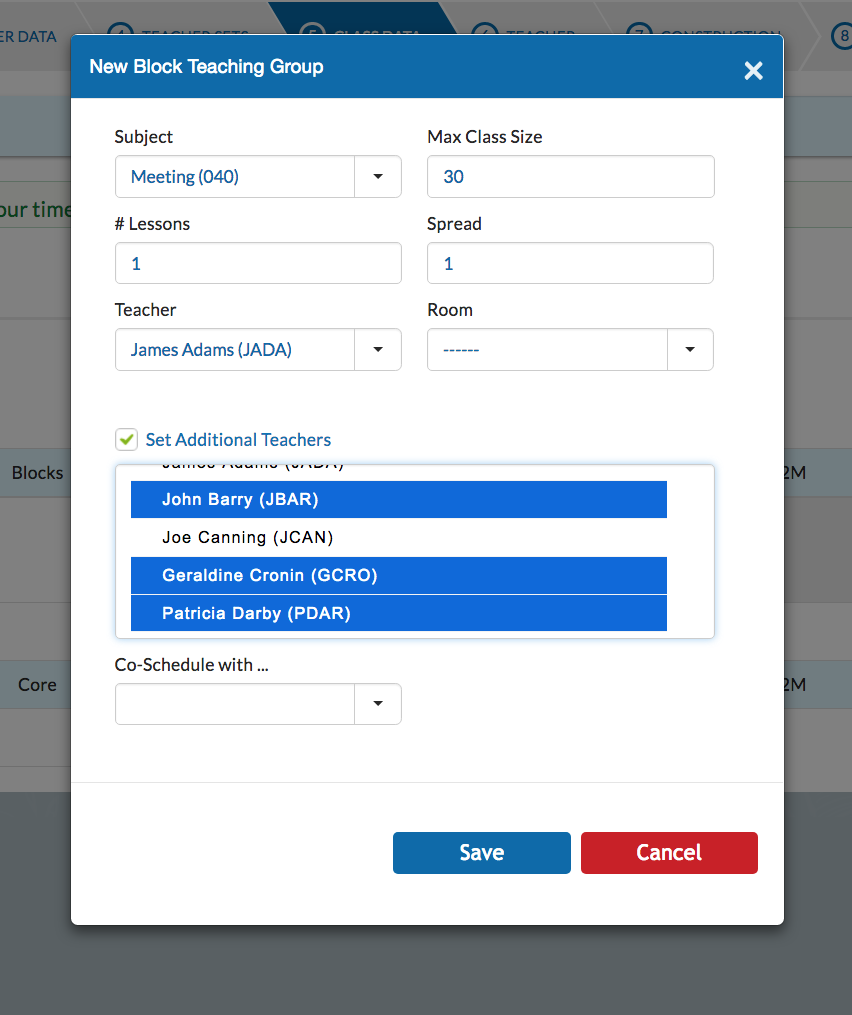
Next, enter the details of this meeting. Make sure there is just one lesson and a spread of 1.
In the below example, The principal James Adams is set as the main teacher, while the other teachers that will be in this meeting are set as additional teachers.
In order to select multiple teachers on a Mac, press Cmd and click and on a Windows, press Ctrl and click.
Click Save.
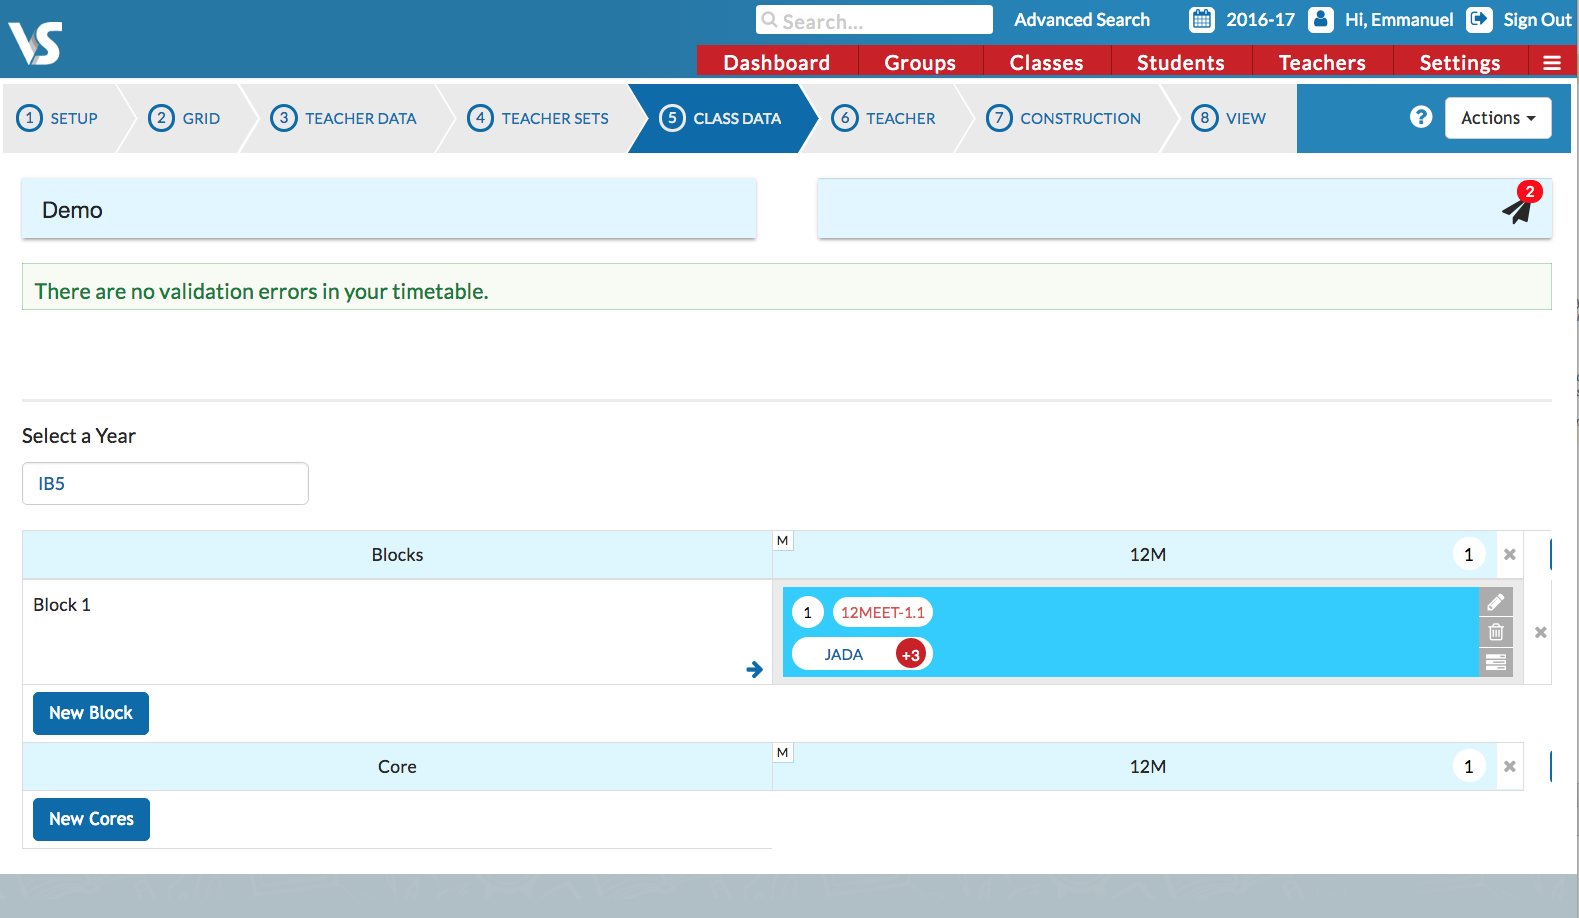
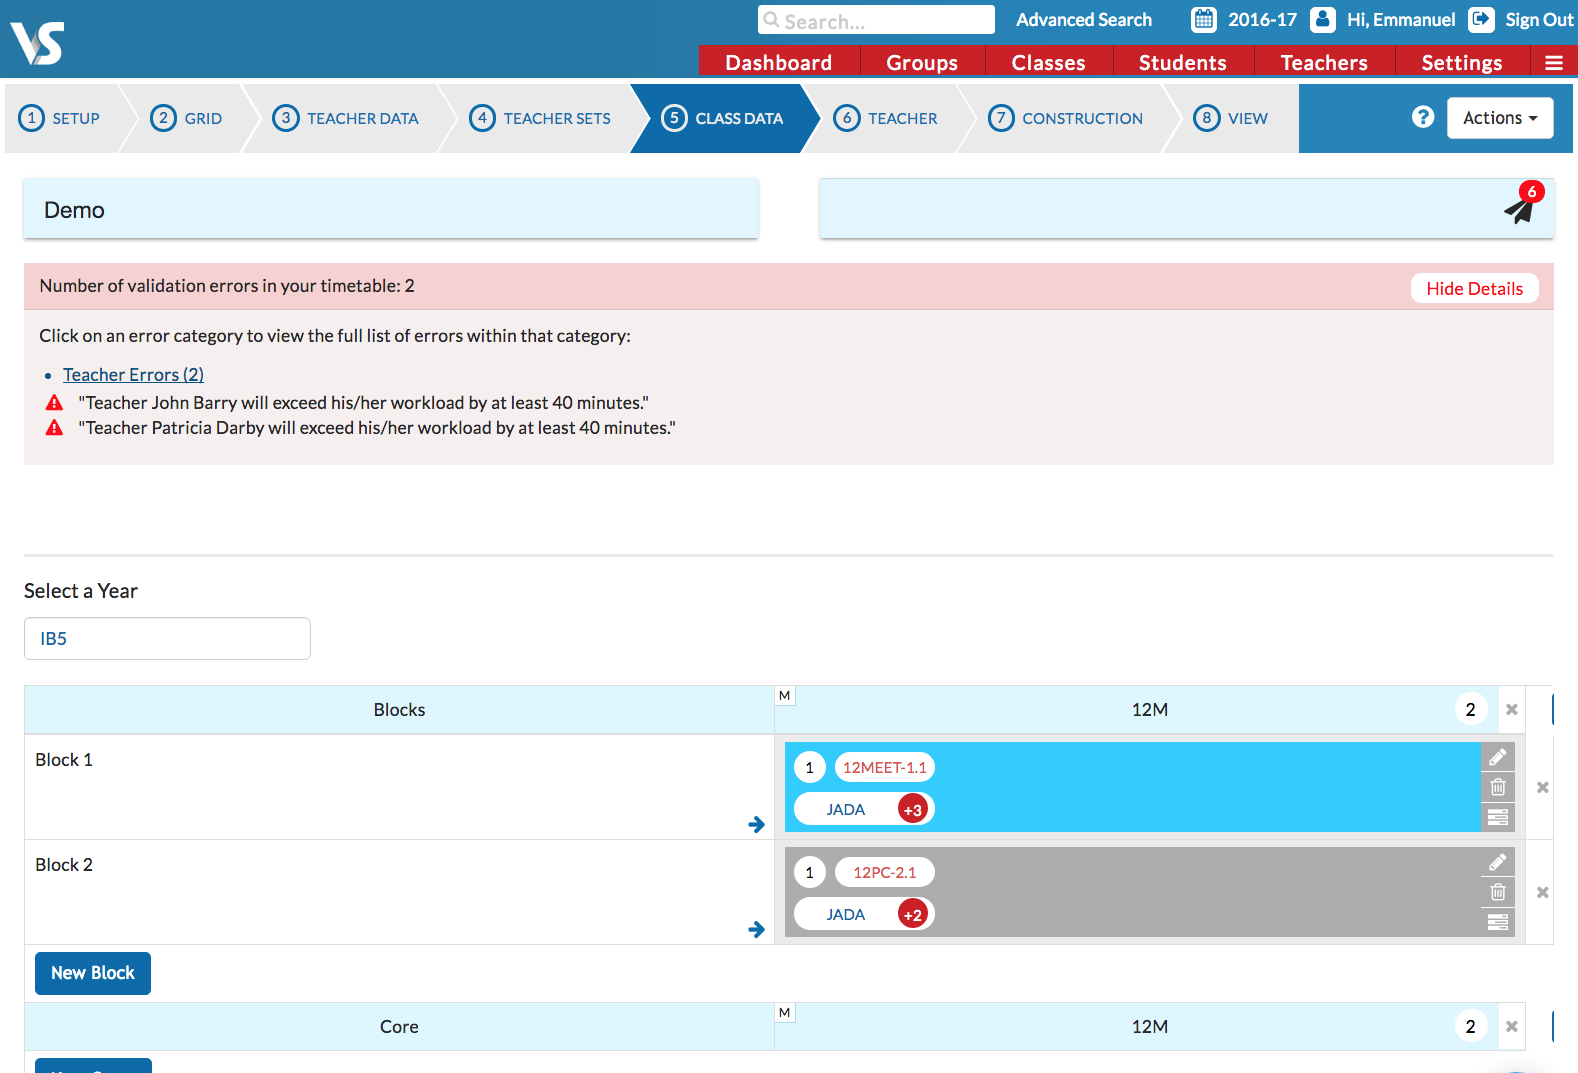
You will then see that the meeting has been created in Class Data as below.
To add another meeting such as Pastoral Care, simply repeat the steps above.
Step 5
Some teacher errors may appear in red a the top of your screen if you have breached the maximum hours set for each teacher in Step 3 of Timetable Construction, Teacher data. This happens because as far as the solver is concerned, these are regular lessons, which of course they are not.
You must resolve these issues by increasing the maximum hours permitted for the teacher in the Teacher Data Screen, otherwise the timetable will not allow you to generate.
Step 6
Go to Step 7 of Timetable Construction, Construction. Scroll to the year you have set the meetings in (e.g. IB5) which is usually at the bottom.
Here you have two choices. To schedule the meetings manually or automatically.
Scheduling meetings manually
In Timetable Construction, Go to Step 7, Construction >
Click on any period where you want either meeting to be scheduled >
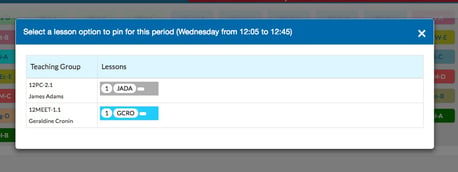
In the pop up box, click on the Meeting you want to add.
In the below example, the Pastoral Care Meeting is now scheduled for 12.05 on Wednesday and this will appear on the timetable of any teacher (main or additional teacher) assigned to the Pastoral Care Teaching Group.


Scheduling meetings automatically
This method is less restrictive than manually scheduling the lesson on one period as the meeting cannot move from this period when scheduling the remainder of the timetable.
In Timetable Construction, Go to Step 7, Construction >
Select 'Actions' > 'Restrictions' > 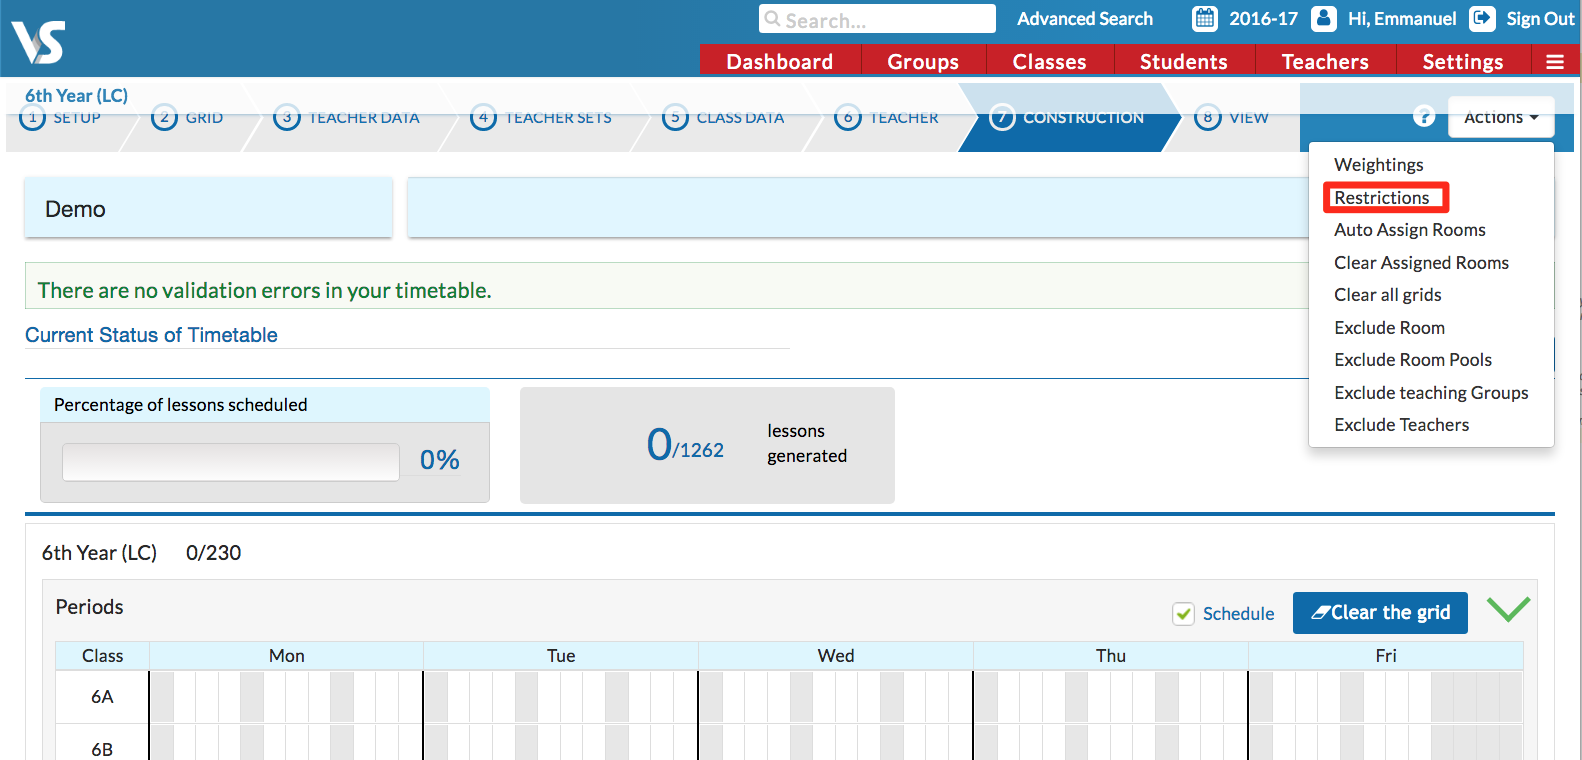
Click on Exclude teaching groups on periods >
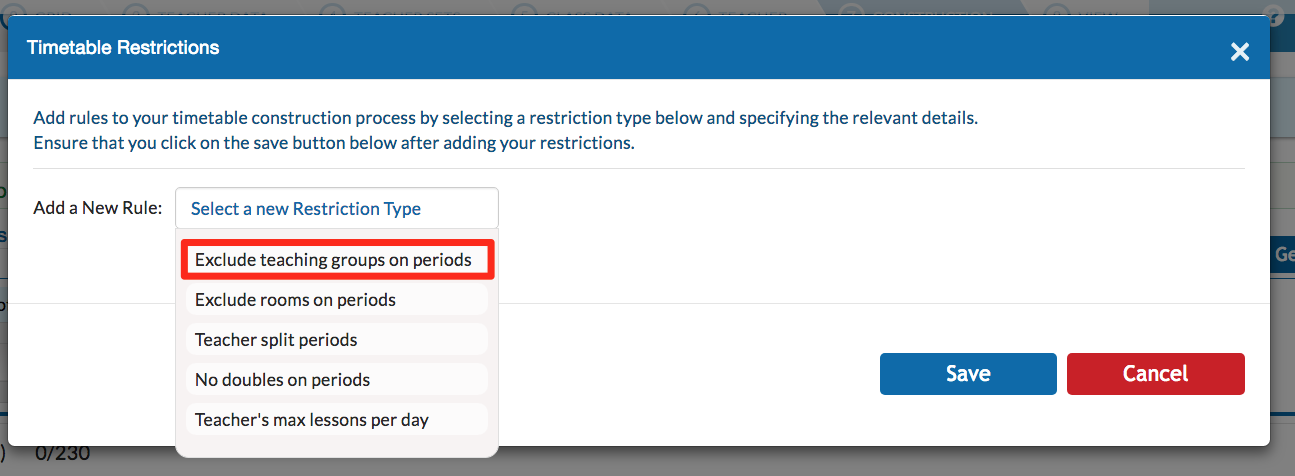
Enter the expression to tell the solver which teaching groups to exclude on certain periods. For example: 12MEET* to specify the Meeting or 12PC* to specify the Pastoral Care Meeting. A separate restriction would need to be entered for each meeting >
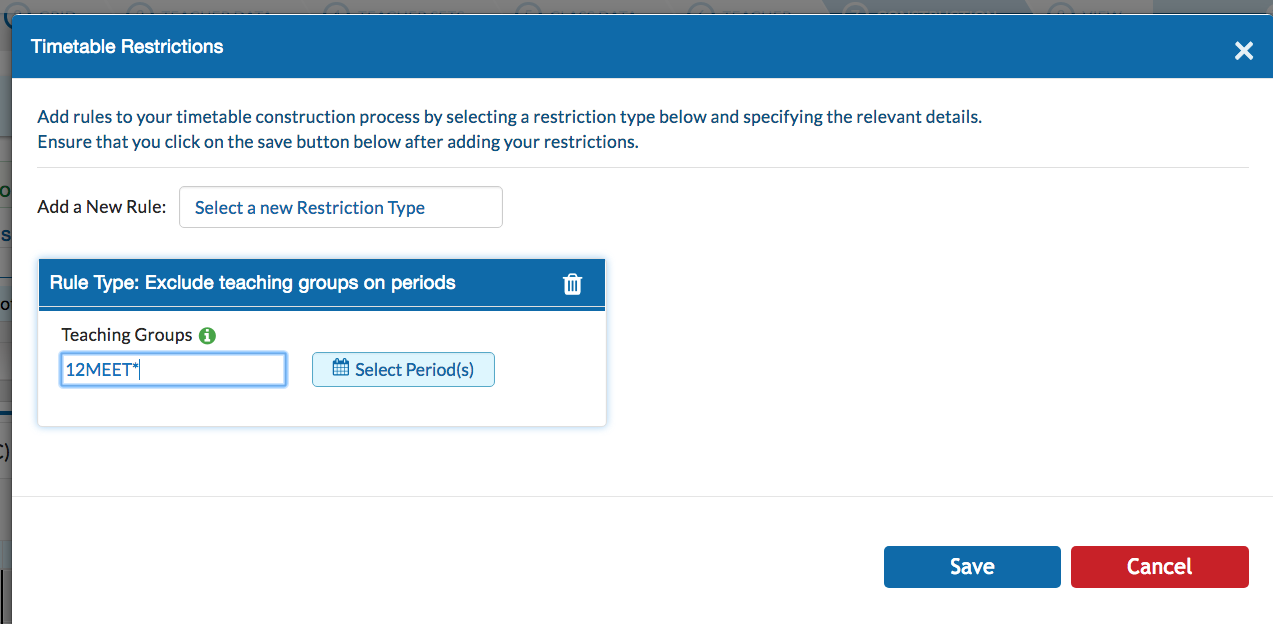
Select the periods > Select > Save.
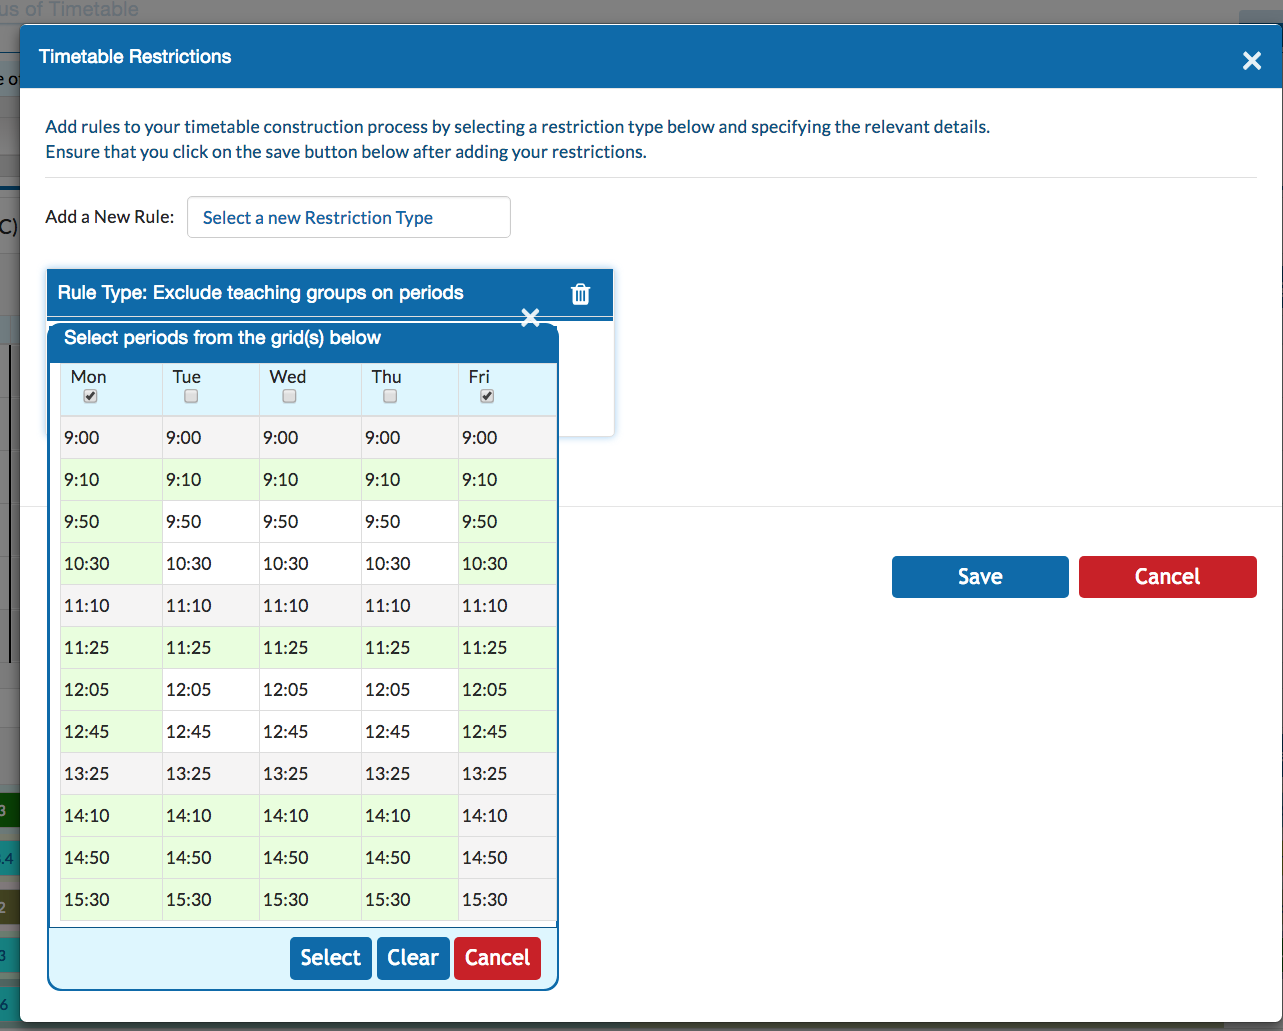
The above example shows that the meeting cannot take place on: Monday or Friday, any afternoon, the first period each day or the period following morning break (the green cells).
This will still allow 12 periods where the meeting can take place and all of these periods are suitable to all teachers in attendance.
Please read the article, An Alternative Method of 'Fixing' Lessons on the Grid to learn more about this method of scheduling.
If you still have questions, please visit our knowledge base at support.vsware.ie. You can contact our support team via email at support@vsware.ie, via the chat bubble when you are logged into your VSware account or via phone on 01-5549628. Support hours are Mon - Fri, 08:30 - 18:00.
