- Help Center
- Exams
-
Frequently Asked Questions
-
Teacher User Guides
-
Assessments
-
Timetabling
-
P-POD
-
Guides for Parents
-
Guides for Students
-
School's guide to Parent Accounts
-
Permission Slips (Communications Package)
-
VS-Mail (Communications Package)
-
Student Profiles
-
Attendance
-
Passwords and Security
-
Principal and Secretary Profiles
-
Teacher Profiles
-
Groups
-
Behaviour
-
Book & Supply Hub
-
Classes
-
Classroom Based Assessment
-
DTR Returns - September Returns & Subject Codes
-
Fees
-
Mailing Labels
-
Settings
-
SMS
-
Supervision & Substitution
-
Subject Options
-
QQI
-
Office365
-
User Hub
-
Unpublished, temp folder
-
Exams
-
AEN and Medical
-
Student Care Monitor (Student Alerts)
Setting Up Extra Fields in an Exam (read time less than 2 minutes)
We’ve recently updated our top menu navigation (July/August 2024). We’re currently updating our user guides to reflect these changes, so thank you for your patience while we work on this. The new menu is user-friendly, so you shouldn’t experience significant disruption. If you need help locating specific items in the new menu however, watch our quick videos for admin users here, and for teachers here.
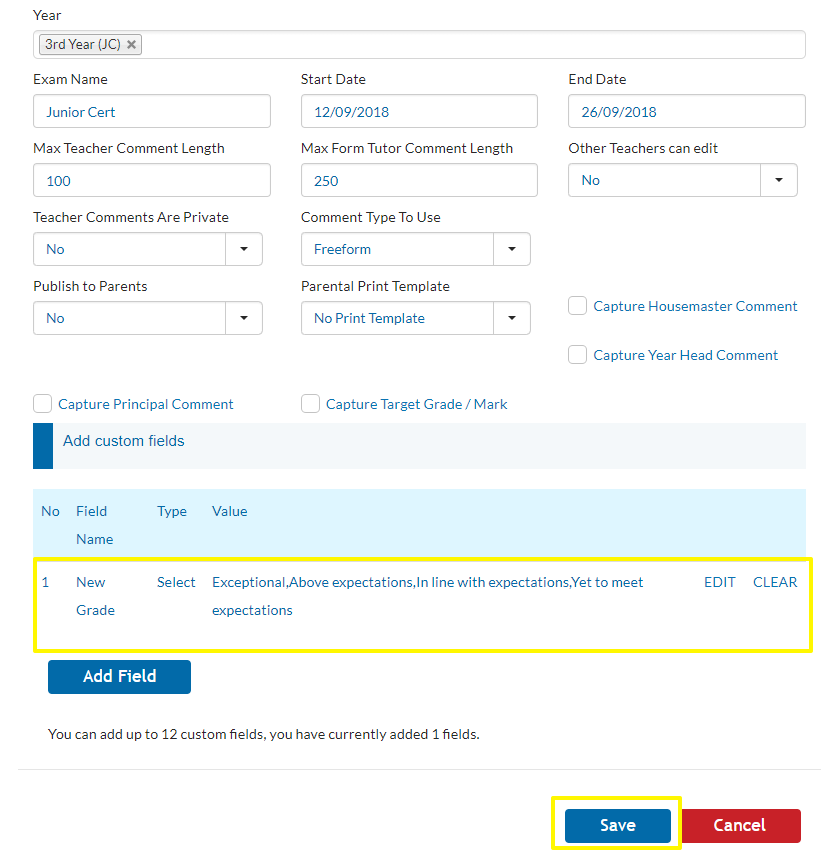
First, go to Settings > Exams > Actions > New Exam.
Then select the 'Add Field' button.
Under 'Type' choose 'Select'.
Under 'Value' type out the list of values that the teachers will choose from when entering results and make sure to separate them by a comma, with no spaces. For example: Exceptional,Above expectations,In line with expectations,Yet to meet expectations
Click 'Save'.

Now that your exam is set up, you will need to create a template to use with this exam.
Go to Settings > Exam Print Templates.
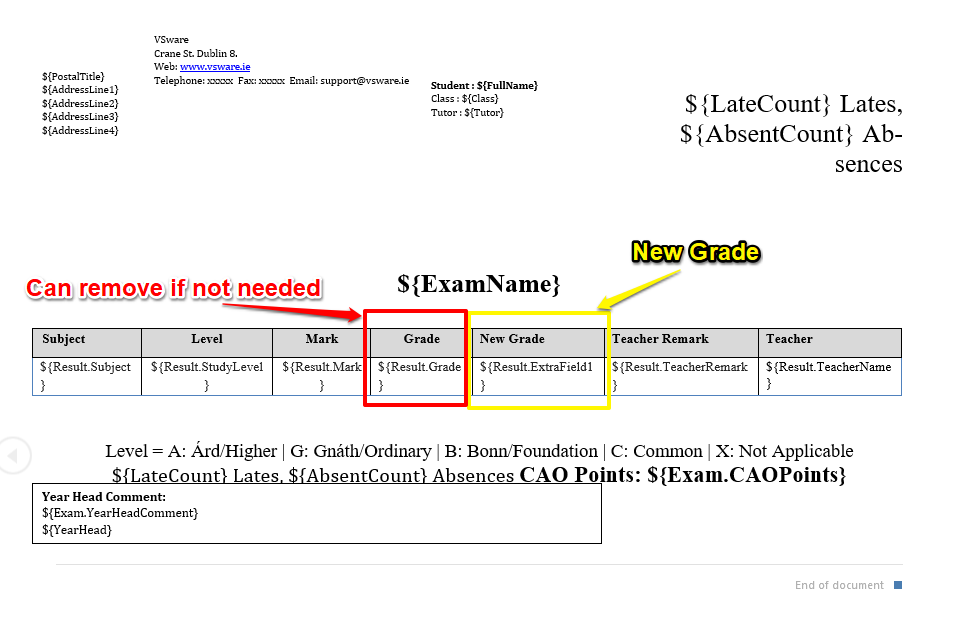
Here you can either upload a new template or edit an existing one. Your template will include a 'New Grade' column containing the variable: ${Result.ExtraField1} to correspond with the extra field you created in your exam. It will look something like the image below.

In cases where you would prefer not to have an extra grade field in your template, you can remove the main 'Grade' column from your template and leave the 'Mark' and 'New Grade' columns only.
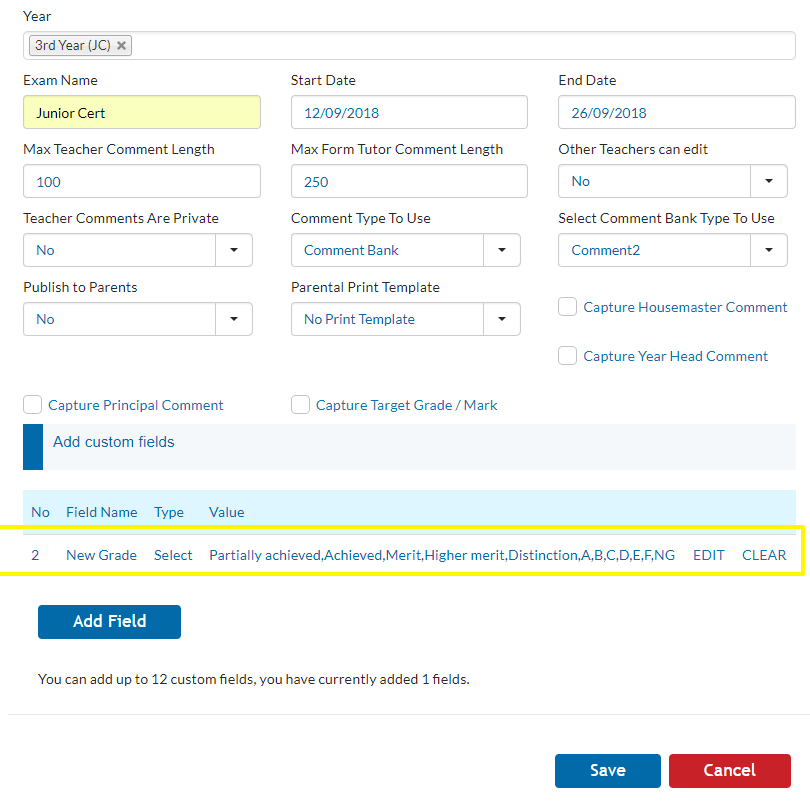
Then in your exam (Settings > Exams > Edit Exam > Add Field) you can enter your values as follows: Partially achieved,Achieved,Merit,Higher merit,Distinction,A,B,C,D,E,F,NG
This way, when teachers are entering in results, they can leave the 'Grade' option blank, and select the grade from the 'New Grade' drop down list.

