- Help Center
- Office365
-
Frequently Asked Questions
-
Teacher User Guides
-
Assessments
-
Timetabling
-
P-POD
-
Guides for Parents
-
Guides for Students
-
School's guide to Parent Accounts
-
Permission Slips (Communications Package)
-
VS-Mail (Communications Package)
-
Student Profiles
-
Attendance
-
Passwords and Security
-
Principal and Secretary Profiles
-
Teacher Profiles
-
Groups
-
Behaviour
-
Book & Supply Hub
-
Classes
-
Classroom Based Assessment
-
DTR Returns - September Returns & Subject Codes
-
Fees
-
Mailing Labels
-
Settings
-
SMS
-
Supervision & Substitution
-
Subject Options
-
QQI
-
Office365
-
User Hub
-
Unpublished, temp folder
-
Exams
-
AEN and Medical
-
Student Care Monitor (Student Alerts)
Office365 - How to Provision Accounts/Groups (read time less than 1 minute)
How to create accounts and groups in Office365
We’ve recently updated our top menu navigation (July/August 2024). We’re currently updating our user guides to reflect these changes, so thank you for your patience while we work on this. The new menu is user-friendly, so you shouldn’t experience significant disruption. If you need help locating specific items in the new menu however, watch our quick videos for admin users here, and for teachers here.
Admin users (principals and secretaries) can provision new accounts or update existing Office 365 accounts:
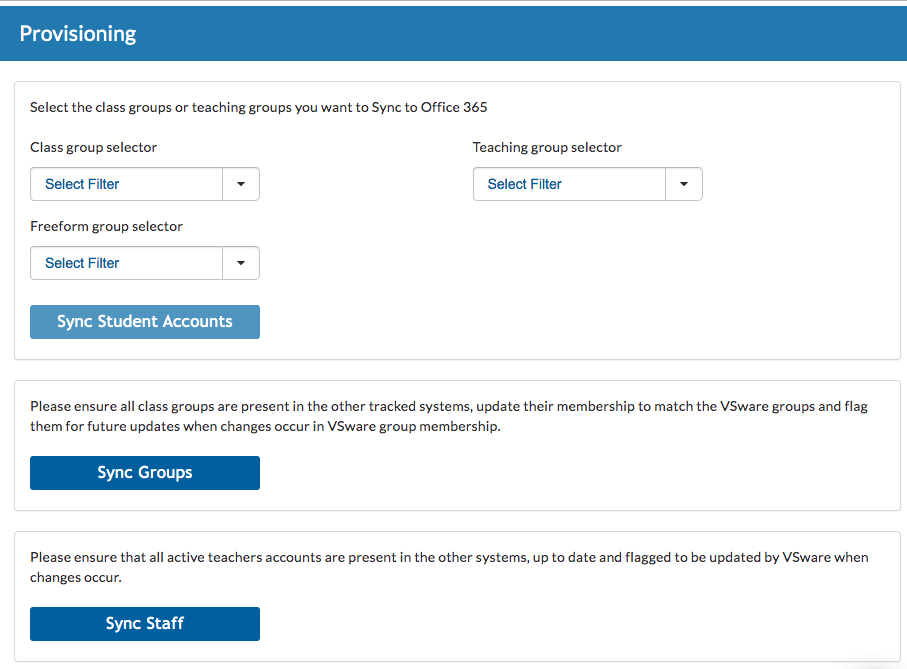
- Go to Settings > Provisioning.

Sync Student Accounts
- Tick the group(s) that the student(s) is/are in and then press Sync Accounts. This will create new accounts for those in the selected classes or groups without them and provide relevant updates to anyone who already has an account.
NEW: Beside the 'Class group selector' and 'Teaching group selector' drop-downs, there is a new 'Freeform Group' dropdown.
Once you select the freeform group and hit 'sync', the students which are members of that selected freeform group will sync to O365.
Sync Groups
- This button will create any group in the system that doesn't already exist as well as update and populate groups that do.
Sync Staff
- This button will create or update accounts for all staff members.
Caution:
When a sync is done, it will update the Office365 password to whatever it is in VSware. Therefore we always recommend that users do not amend their passwords in Office as there is a danger that they will be locked out due to their password being amended.
