![VS-Logo-1.jpg]](https://support.vsware.ie/hs-fs/hubfs/VS-Logo-1.jpg?height=40&name=VS-Logo-1.jpg)
Last updated 07/08/2026
Permission Slips are electronic forms used by schools to gather parental or student consent for activities such as trips, matches, events, photo permissions and more. With the latest upgrade, Permission Slips now support two types: Consent and Event, and include new workflows that connect Permission Slips directly to key areas like fees, attendance, substitution, class away, teacher involvement, risk assessments, and admin approval.
This guide explains how school administrators and (and teaching staff with the relevant permissions) can create, approve, publish, and manage Permission Slips using the updated system.
Please note: The Permissions Slips feature is currently part of the Communications Package. Visit vsware.ie/vsmail to read some of the benefits and to register your interest in using it.
Double click on the video to expand to full screen
User Permissions Overview
By default, Principal and Secretary accounts have full access to create, edit, approve, publish, and view all Permission Slips.
Staff (teacher) permissions can be customised:
- Manage all permission slips
- Manage their own permission slips only
- View all permission slips
Teachers can create Permission Slips as usual if they have the correct permissions, but in the case of Event slips, they require admin approval before publishing. In this case teachers can suggest a fee amount for approval by the school administrator.
Permission Slip Types
-
Consent (Used for simple activities that do not require operational changes. These work in the same way that Permission Slips always have)
- Event (Used for trips, matches, off‑site activities, or anything requiring operational changes)
Event Permission Slips include fields such as:
- Teacher involvement
- Attendance code
- Optional substitution
- Optional class away
- Optional fee linking
- Clash detection
- Admin approval workflow
- Automatic scheduling of attendance, class away, and teacher absence/substitution
Please note that templates can only be used for Consent slips, not for Event slips.
Creating a New Permission Slip
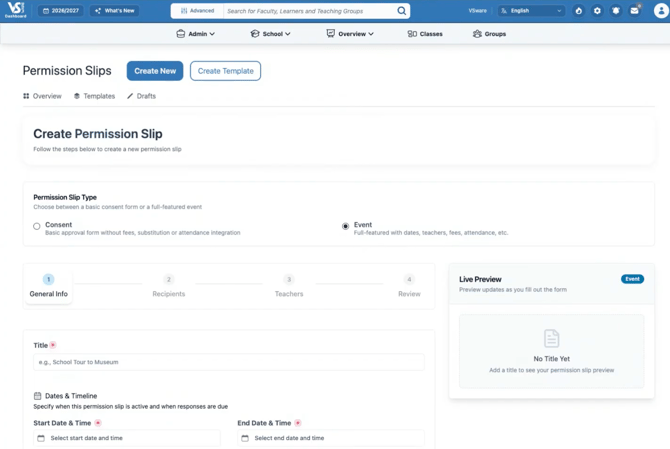
If you select "Consent" as the permission slip type, fewer steps are required. However, this guide will demonstrate the "Event" permission slip process, which includes all possible options.
-
Start by clicking School > Permission Slips > Create New.
-
Select 'Event' on the right
Creating a New Permission Slip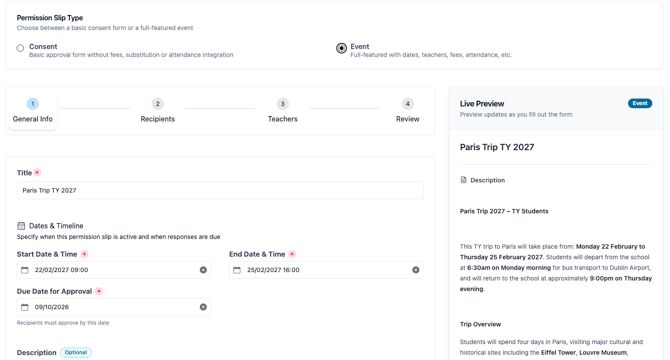
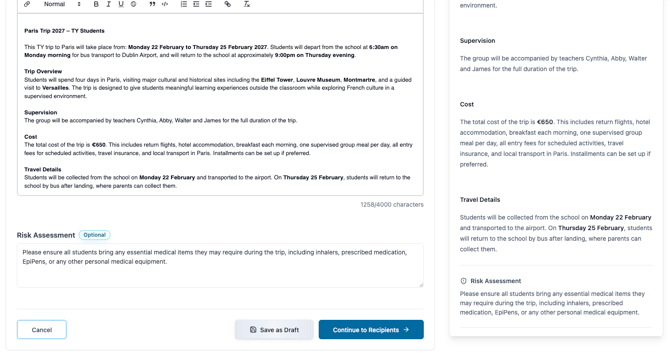 Next, enter all relevant general information including the following:
-
event title
-
start and end date and time of the event
-
due date for approval
-
event description (this can be formatted, including adding attachments and hyperlinks)
- Risk assessment (for important reminders about things like medication etc.)
Select 'Continue to Recipients'
Recipients
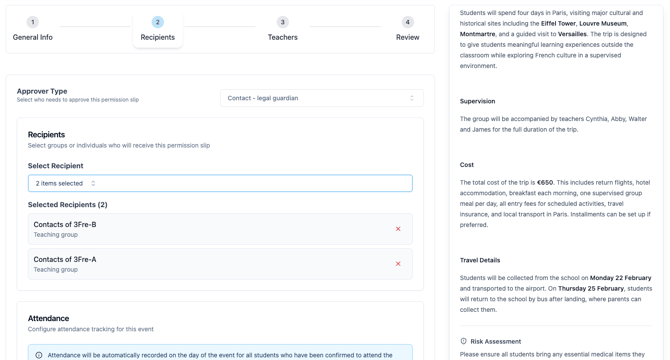
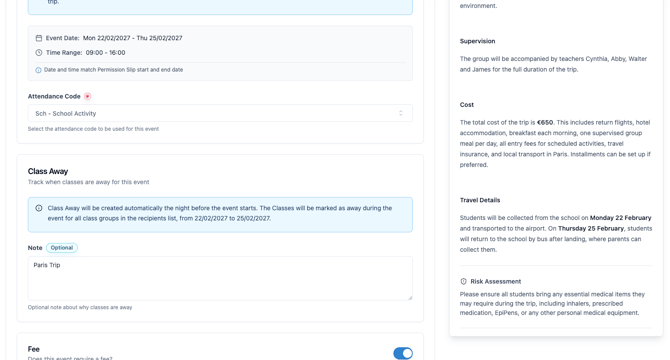
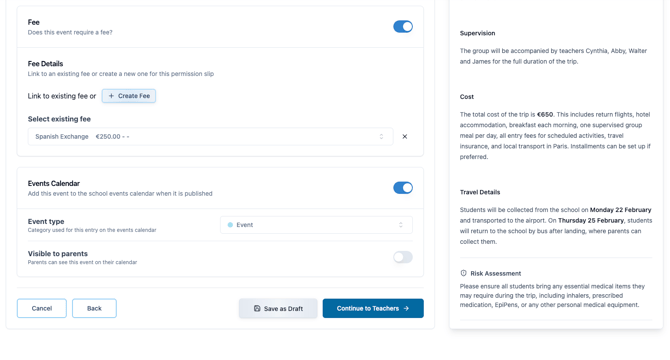
In the Recipients screen, enter the following:
-
Approver type (usually this will be parent / contact, however in some cases it may be the student themself)
- Recipients, e.g. Contacts of Transition Year base classes 1 and 2, or Contacts of 3Fre-A and 3Fre-B (this can be an individual, group, base class or teaching group. Note that you can include Class Away tracking if you select a class group.)
- Attendance code (once the Permission Slip is published and approved by the parent, the attendance code will be automatically applied to the relevant student's record for the relevant dates.
- Fee (once the Permission Slip is published and approved by the parent, the Fee will be applied to the relevant student and will be available for parents to make a payment. You can select an existing fee, or create a new one from scratch)
- Events calendar (link the event to your school's event calendar with the option to make visible to parents)
Teachers
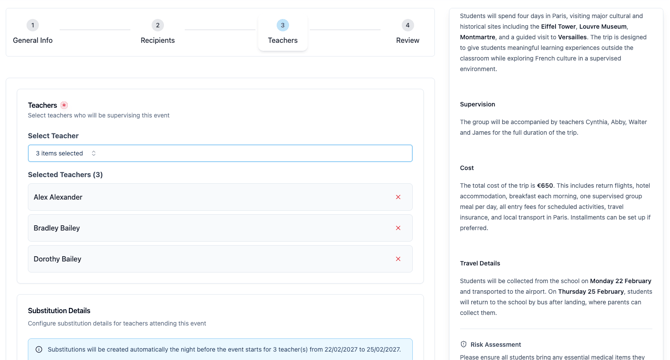
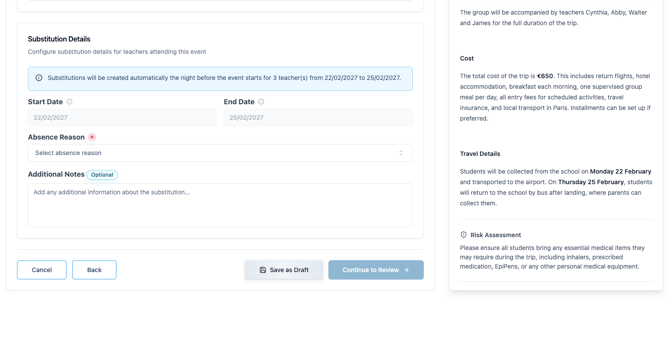 In the Teachers screen, enter the following:
-
The teachers who will be involved with the event
- The 'Absence Reason' for Substitution and additional notes (once the permission slip is published, the substitution record for the relevant teachers will be automatically updated the night before the event)
Select 'Continue to Review'
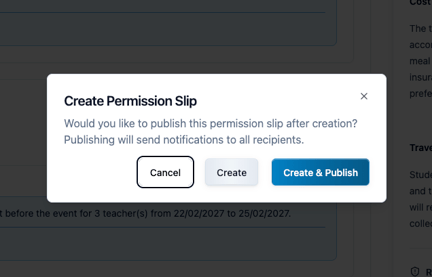
Once you are happy, select Create (to save for later), or Create & Publish (to publish to parents now)
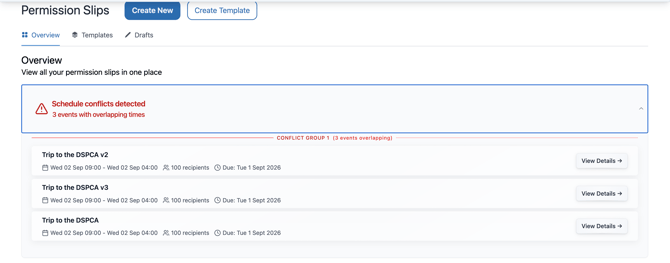
Schedule Conflicts
If event times overlap, this will appear as an alert on the Permission Slips Overview screen. It does not block the event or make any changes automatically- it simply lets you know so you can review it and decide if any action is needed.
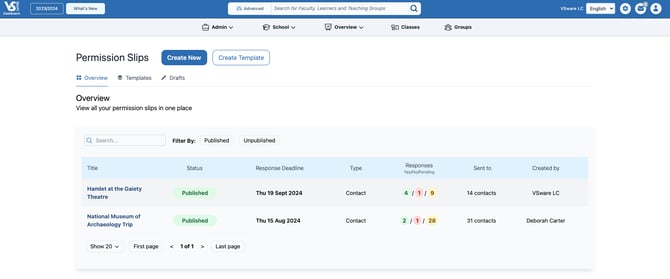
Managing Permission Slips
- After publishing, your permission slip will appear on the Overview screen, where you can monitor its status.
- This screen gives an overview of how many responses are Approved, Denied, or Pending.
- You can also filter by Published or Unpublished slips and search by the name of the permission slip.
Managing individual permissions
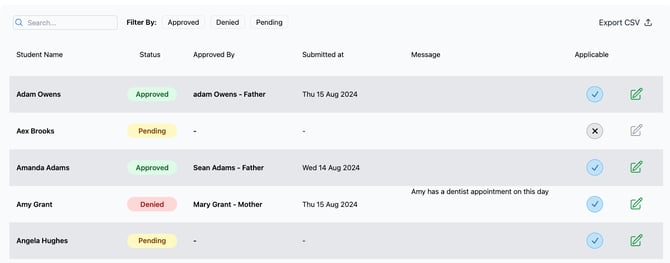
As responses come in, you can manage them individually. Click into the relevant permission slip to see the individual responses.
From this screen you can do the following:
-
Click "Remind" to send a reminder notification.
-
Click "Duplicate" to copy the existing permission slip.
- Click "Edit" to make changes, such as adding students or updating the due date.
- Click "Delete" to make remove the permission slip altogether.
- If a student in the group isn’t participating in the event, mark them as "Not applicable" by clicking the blue tick and selecting "Yes."
- Approve, deny, or edit a permission slip on behalf of a parent by clicking the pencil icon to make the change, adding a note if needed, and
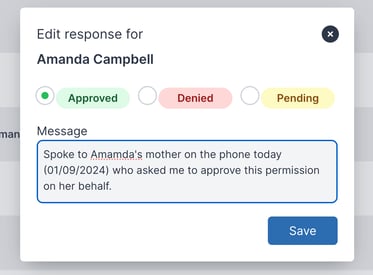 saving.

Using Templates and Drafts
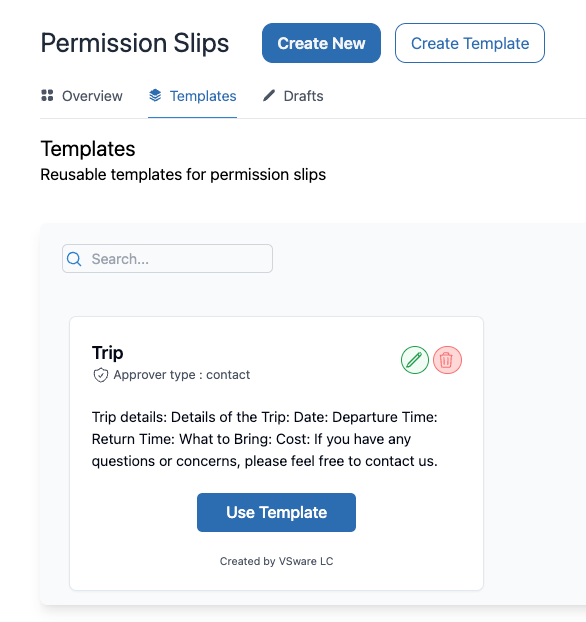
- Beside the Overview tab is the Templates tab. Here, you can create templates to speed up the process when creating future permission slips.
- To create a new template, click Create Template, fill in the details, and click Create. The template will then be available for future use. You can also attach files to a template if you wish.
- Templates can only be used for consent type permission slips. They can't be used for event Permission slips.
- The drafts tab is located next to the Templates tab.
If you still have questions, please visit our knowledge base at support.vsware.ie. You can contact our support team via email at support@vsware.ie, via the chat bubble when you are logged into your VSware account or via phone on 01-5549628. Support hours are Mon - Fri, 08:30 - 18:00.