We’ve recently updated our top menu navigation (July/August 2024). We’re currently updating our user guides to reflect these changes, so thank you for your patience while we work on this. The new menu is user-friendly, so you shouldn’t experience significant disruption. If you need help locating specific items in the new menu however, watch our quick videos for admin users here, and for teachers here.
The Option Block screen captures the information entered in the first three screens. When you first view this screen (before pressing Generate Blocks) it will display very little colour. This will change when the block generation is in progress. No blocks will be present but you will see the blank table showing Opt Block 1,2,3 etc.
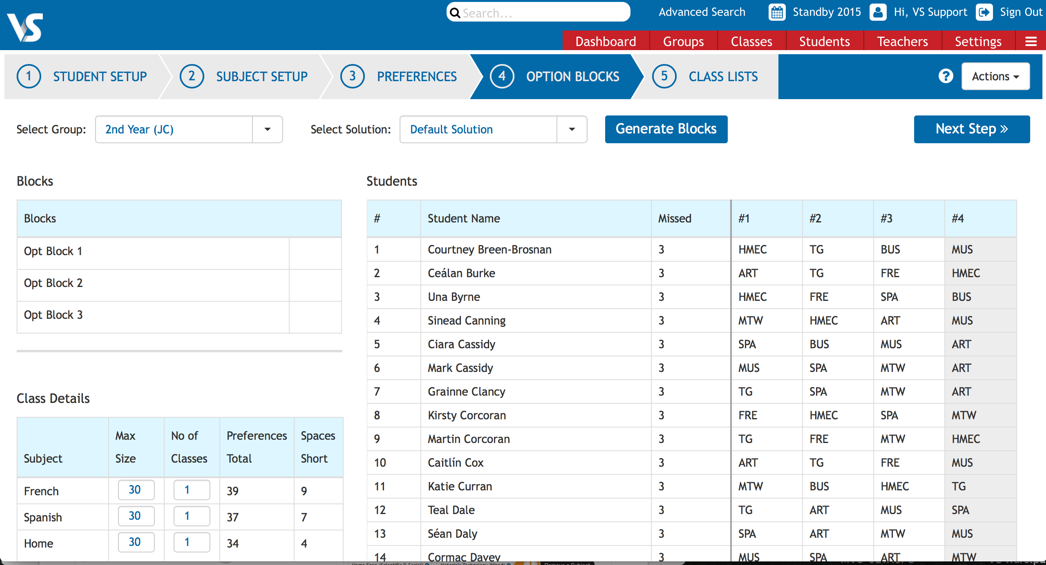
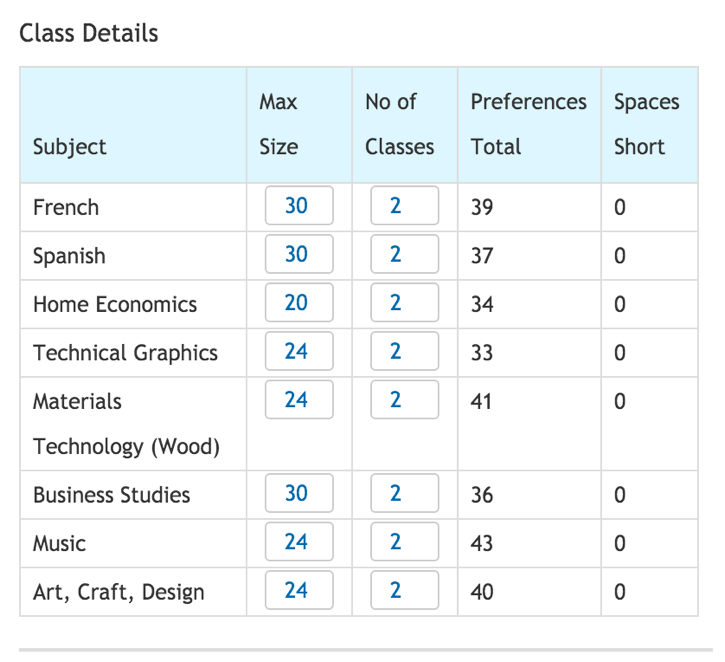
When you are satisfied that you have the correct numbers of classes and that the maximum class sizes are correct, click on the “Generate Blocks” button. In the table below, we have asked the software to create 16 Classes.
A dialogue box will appear to show you that the blocks are being generated and you can stop this at any time by clicking on the button 'Get Best Now'
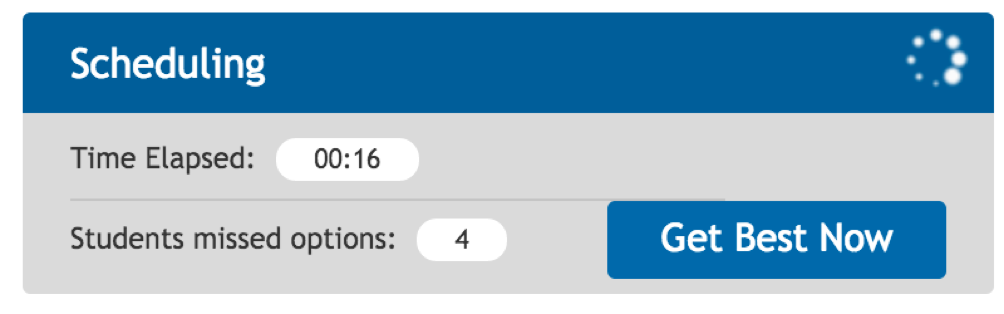
Some solutions will be found very quickly. As the software generates, it will try to improve your solution by satisfying a higher number of students’ preferences and also trying to balance the classes if there is more than one class in any subject.

The Option Blocks will appear and are colour-coded to match the colours on the spreadsheet-styled table. The teaching group codes will be given automatically and this will show the exact block and position of the class in the block.
If you examine the colours in the above screenshot, you will see that student number 3 in the table, Una Byrne will be studying Home Economics in Opt Block 1(2 HmEc 1.2); French in Opt Block 3 (2 Fre 3.1) and Spanish in Opt Block 2 (2Spa 2.2). You will also notice that 16 classes have been created in the blocks.
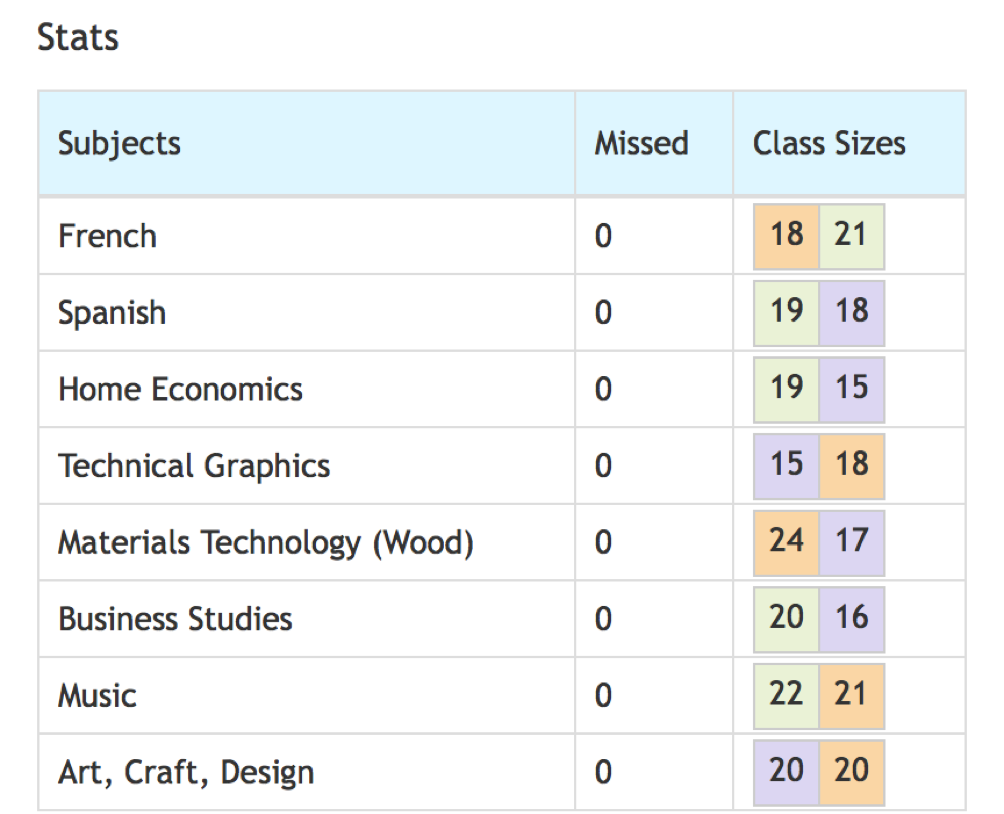
In the table below we show the class sizes for each subject in the blocks and it will also report how many students have missed a subject (if this has occurred)
You can also clone solutions, meaning you can make tweaks without losing your previous work.
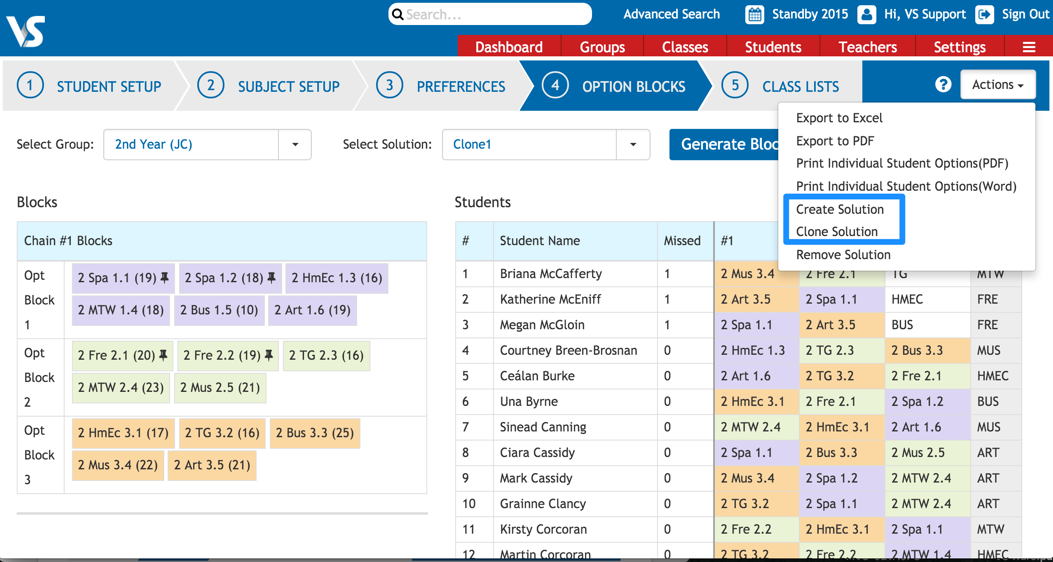
To create a clone, go to the Actions button while viewing screen 4 (Option Blocks). Click on Clone Solution, give your clone a name and save. When you create or clone a solution, you will then view the newly created screen. It is possible to switch between solutions using the ‘Select Solution’ dropdown list box.
Solutions can also be removed (deleted) using the Actions button. You will receive a warning if you ‘Remove Solution’ as this is irreversible.
Note:
Create Solution will reset the number of classes and their sizes if they have already been set.
Clone Solution will make an identical copy of the existing solution
Some schools like to experiment with solutions and to view the consequences of making changes in the following areas:
- Changing the number of classes to be created in a subject
- Ensuring that certain classes run in the same block to allow streaming
- Ensuring that some classes don’t run in the same block as the two subjects involved may have only one qualified teacher.
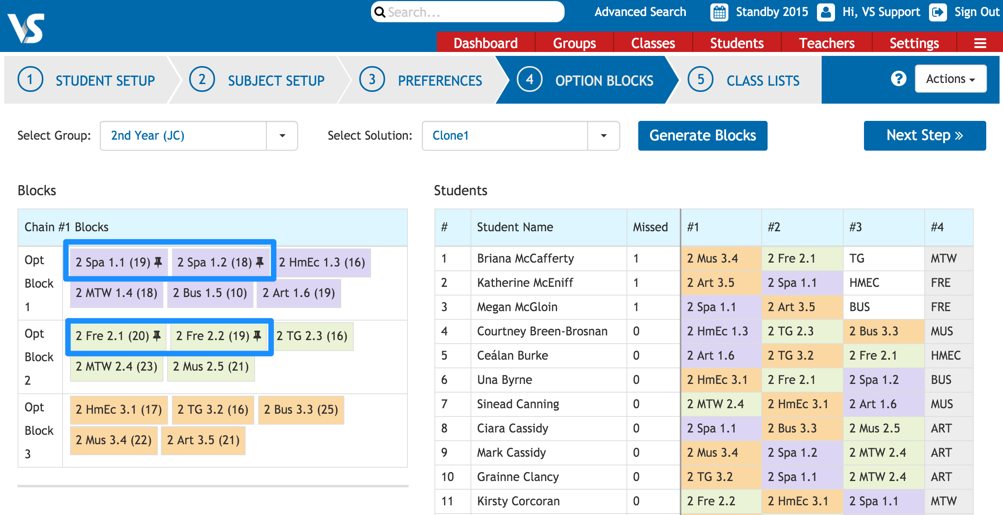
In the screenshot above, we have created a New Clone called ‘Clone1’ and manually dragged the Spanish and French classes so that each language will be in the same block. Some schools do this to allow students move between higher and ordinary classes.
When you move any of the created classes to a different block, a pin will appear. If you click on any class, the pin will also appear. This will fix these classes to this block and when you then click ‘Generate Blocks’ the unpinned classes are free to move wherever they wish. As you can see from the results, the solution given failed to satisfy all of the students on this occasion. 3 students missed their 3rd preference and will be granted their 4th preference instead.