Grade sets, comment banks and Template Management. This article is intended for Admin. (Read time: 3 minutes)
We’ve recently updated our top menu navigation (July 2024). We’re currently updating our user guides to reflect these changes, so thank you for your patience while we work on this. The new menu is user-friendly, so you shouldn’t experience significant disruption. If you need help locating specific items in the new menu however, watch our quick videos for admin users here, and for teachers here.
Last updated 05/10/2022
Only principal and secretary users can access assessment settings.
There are three sections within Settings:
1. Grade Sets
2. Exam Comment Bank
3. Template Management
1. Grade Sets
When teachers are entering results for a particular exam, they are presented with a set of grades to choose from. These grade sets must be set up by the administration user first. Then, when each exam is created throughout the year, the admin user chooses which grade set (if any) will be associated with that exam.
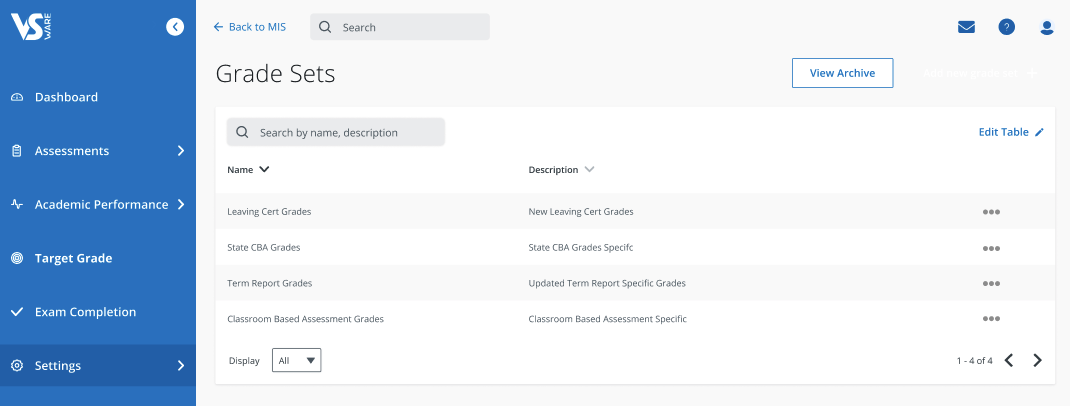
- To add/create a new grade set: go to Assessments > Settings > Grades Sets > select the blue 'Add new grade set +' button > add the name of the grade set > Next > add the order, value and description of each grade in the new grade set > click 'confirm'.
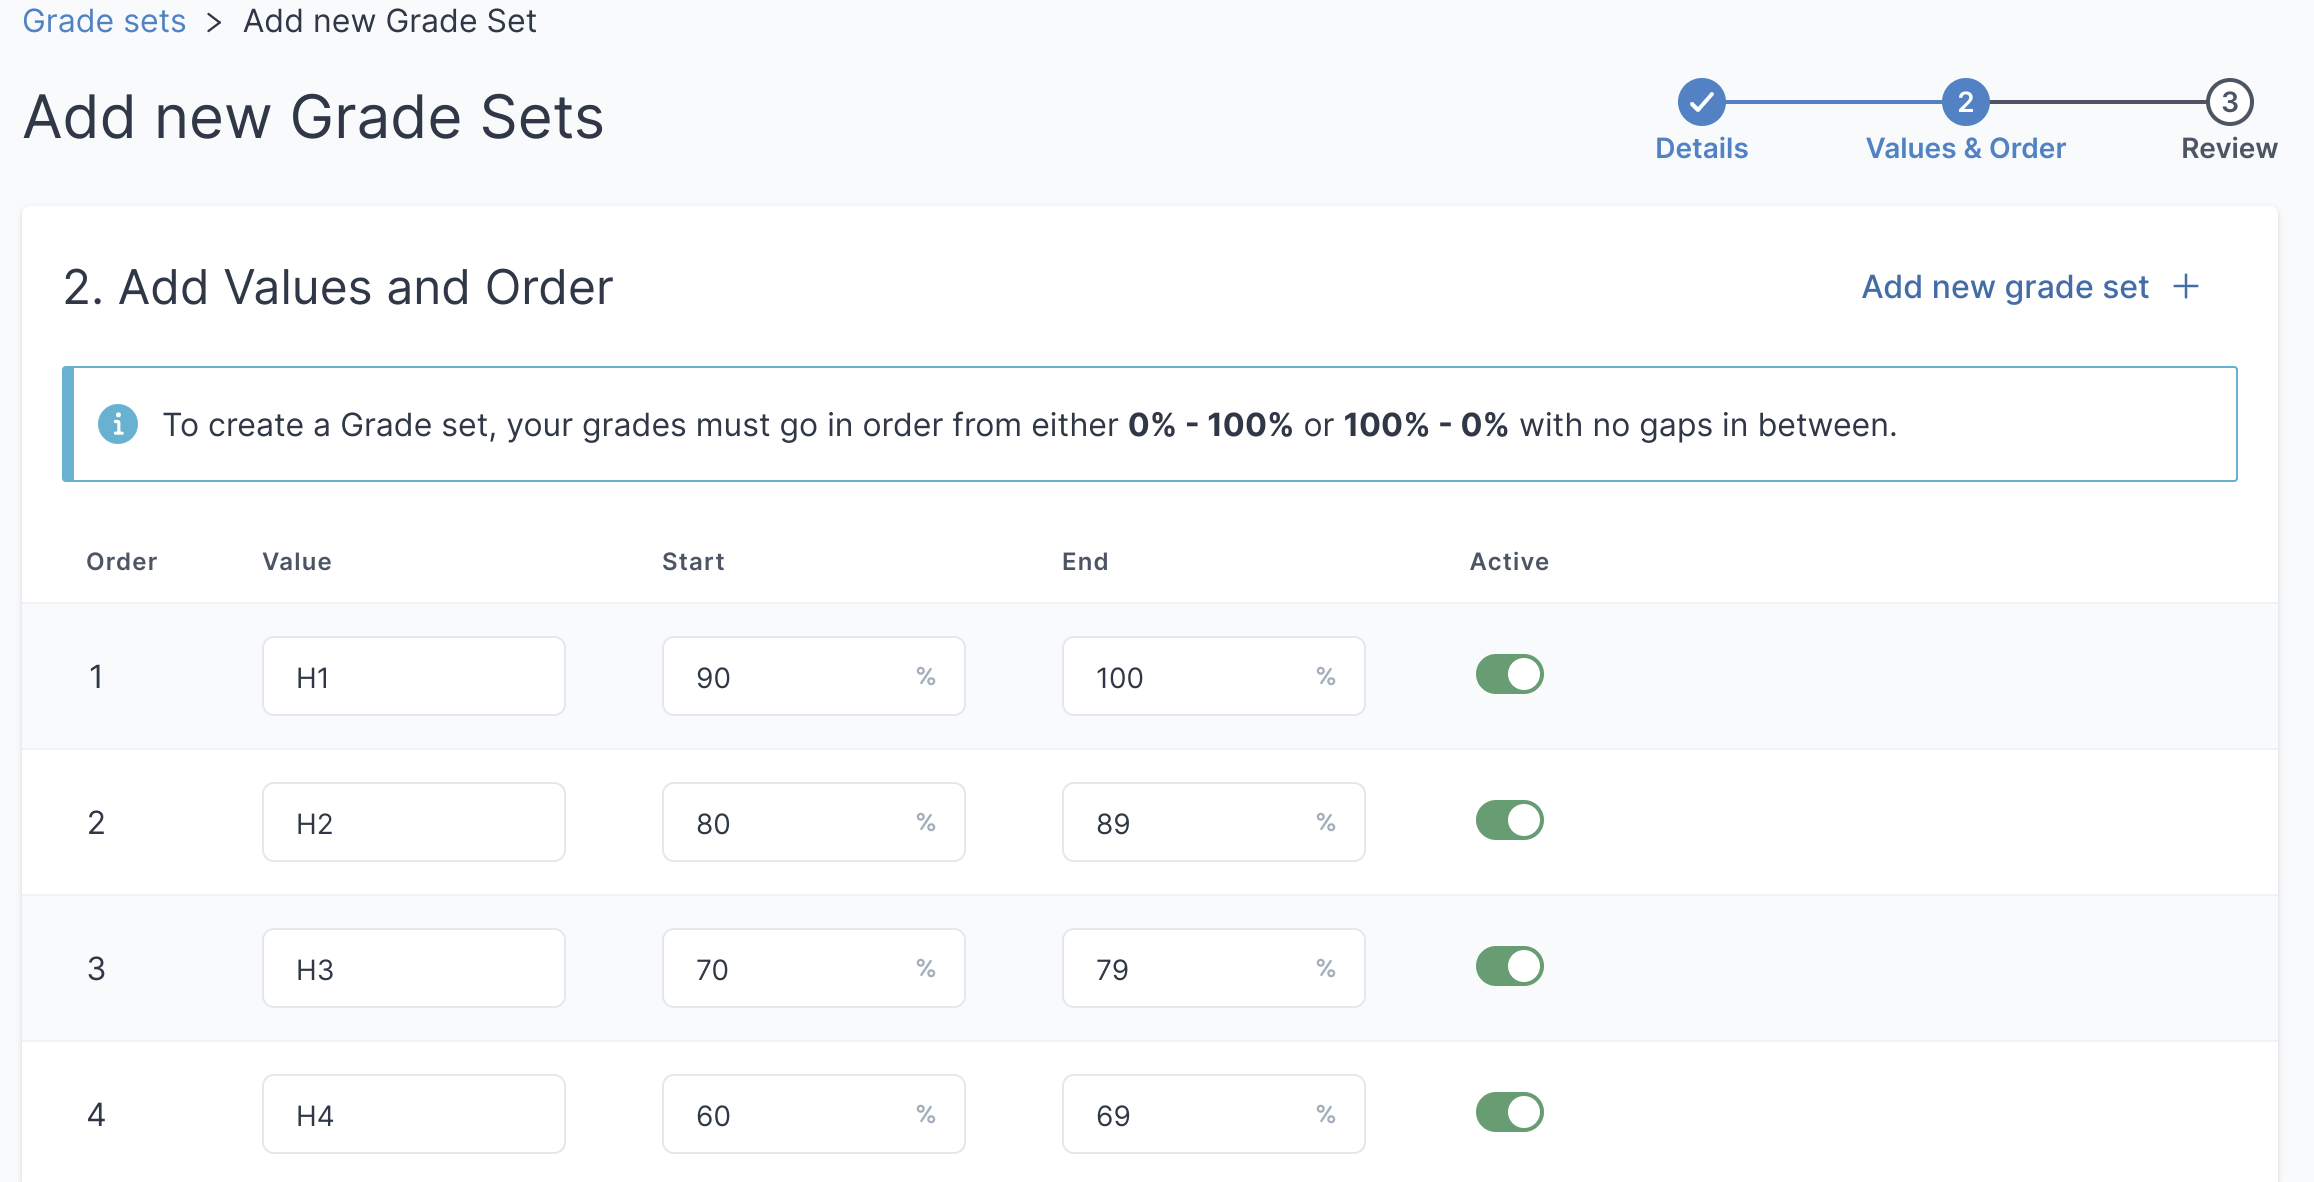
- To edit an existing grade set: go to Assessments > Settings > Grades Sets > select the three dots and edit grade set > go to the specific grade you want to change > three dots > edit grade > update the details > save.
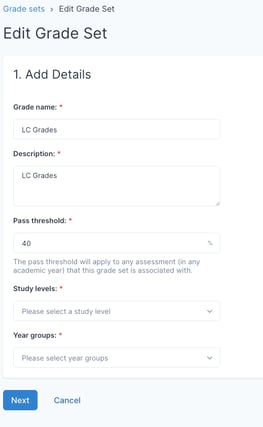
- To view a grade set: go to Assessments > Settings > Grades Sets > select the three dots > View Grade Set. Here, it is now possible to see an overview of the Grade Set details including associated year groups, the pass threshold and study levels.
- To archive an existing grade set: go to Assessments > Settings > Grades Sets > select the three dots > Archive grade set. You can instead view the grade set, then go to a specific grade and archive just one grade.
- To view an archived grade set: go to Assessments > Settings > click 'View Archive' button on the top right.
Example of a grade set: Leaving Cert grading scale
H1 / O1 = 90-100
H2 / O2 = 80<90
H3 / O3 = 70<80
H4 / O4 = 60<70
H5 / O5 = 50<60
H6 / O6 = 40<50
H7 / O7 = 30<40
H8 / O8 = 0<30
- Auto Generation of Grades: Please note, if you would like the Grade to appear beneath the Result when entering, the level must be selected and the Study Level must also be selected within the Grade Set
- The Example below will Auto-Generate a Grade for every level selected

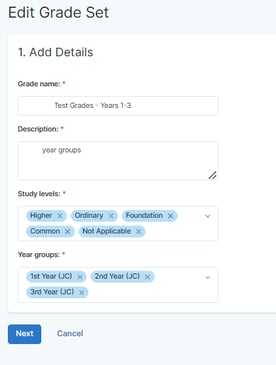
Schools can now assign specific grade sets to year groups
It is now possible to assign a grade set to a year group so that you can have leaving cert years and junior cert years associated to the same term assessment, and use separate grade sets without causing any complications. Schools no longer need to create separate assessments for each year for the same exam.
In short, it means that for example a junior cert student will never get a leaving cert grade and a leaving cert student will never get a junior cert grade because the system will always know what grade to apply (providing the grade set has been included in the exam!).
Steps
- 3 lines > Assessments > Settings > Grade sets > Add new grade set > Add the relevant year groups
Or
- 3 lines > Assessments > Settings > Grade sets > Click the 3 dots to the right of an existing grade set > Edit grade set > Add the relevant year groups
Note:
When a teacher goes to the results entry screen for one of their teaching groups, they will only see the grade set options that have been associated with that year group.
2. Exam Comment Bank
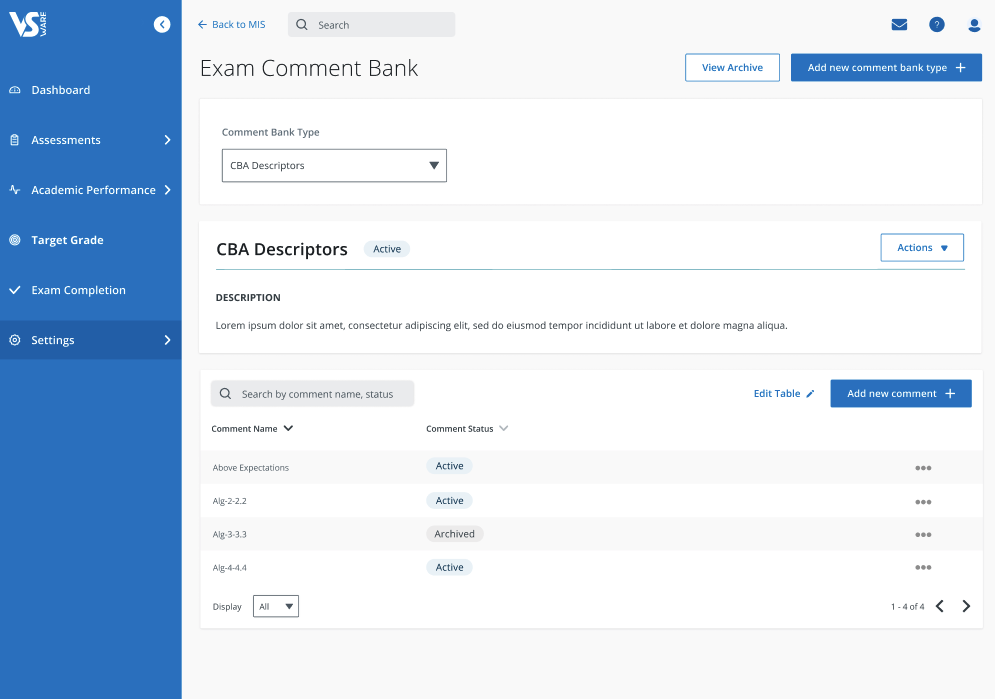
When teachers are entering results for a particular exam, they are sometimes presented with a set of pre-written comments to choose from. These comment banks must be set up by the administration user first. Then, when each exam is created throughout the year, the admin user chooses which comment bank (if any) will be associated with that exam.
To add a new comment bank type: go to Assessments > Settings > Comment bank > select the blue 'Add new comment bank type +' button > add the name and description > add each individual comment > save.
3. Template Management
Customisable templates
Here are some generic templates that your school can download and edit. Click to download.
Term Assessment Template (Summer exam, State exams etc.)
Joined Term Assessment and State CBA Template
For the full guide on creating, generating or printing report templates, click here.
Template Management is what was once 'Exam Print Templates'. It is where principal or secretary users can upload and store their Term Assessment Templates (previously term report templates).
To upload a new template: go to Assessments > Settings > Template Management.
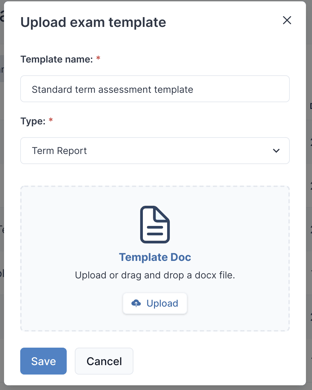 Type a name (this is the name anyone who is downloading or generating a term report will see)
- Select a type, either a Term Report or a CBA report. This will allow you to easily categorise them later.
- Then upload the word document (.dox) that you have prepared.
- Hit 'save'
To edit an existing template: go to Assessments > Settings > Template Management.
- Select the three dots beside the template
- Click 'download'
- Edit the template in Microsoft Word and re-upload as per the instructions above.
- You can also delete a template from this screen if needed.
If you still have questions, please visit our knowledge base at support.vsware.ie. You can contact our support team via email at support@vsware.ie, via the chat bubble when you are logged into your VSware account or via phone on 01-5549628. Support hours are Mon - Fri, 08:30 - 18:00.
