Easily view a student's academic record and monitor results over time at a glance.
We’ve recently updated our top menu navigation (July/August 2024). We’re currently updating our user guides to reflect these changes, so thank you for your patience while we work on this. The new menu is user-friendly, so you shouldn’t experience significant disruption. If you need help locating specific items in the new menu however, watch our quick videos for admin users here, and for teachers here.
These two reports are useful for a number of reasons.
1. You can keep track of a student's academic progression over time.
2. You can view multiple student's records at once, eliminating the need to visit each individual student's personal record.
3. You can enable a permission that allows teachers to use these reports, saving time for admin staff. Instructions on how to enable this for both reports is at the end of this guide.
Results Cross tab
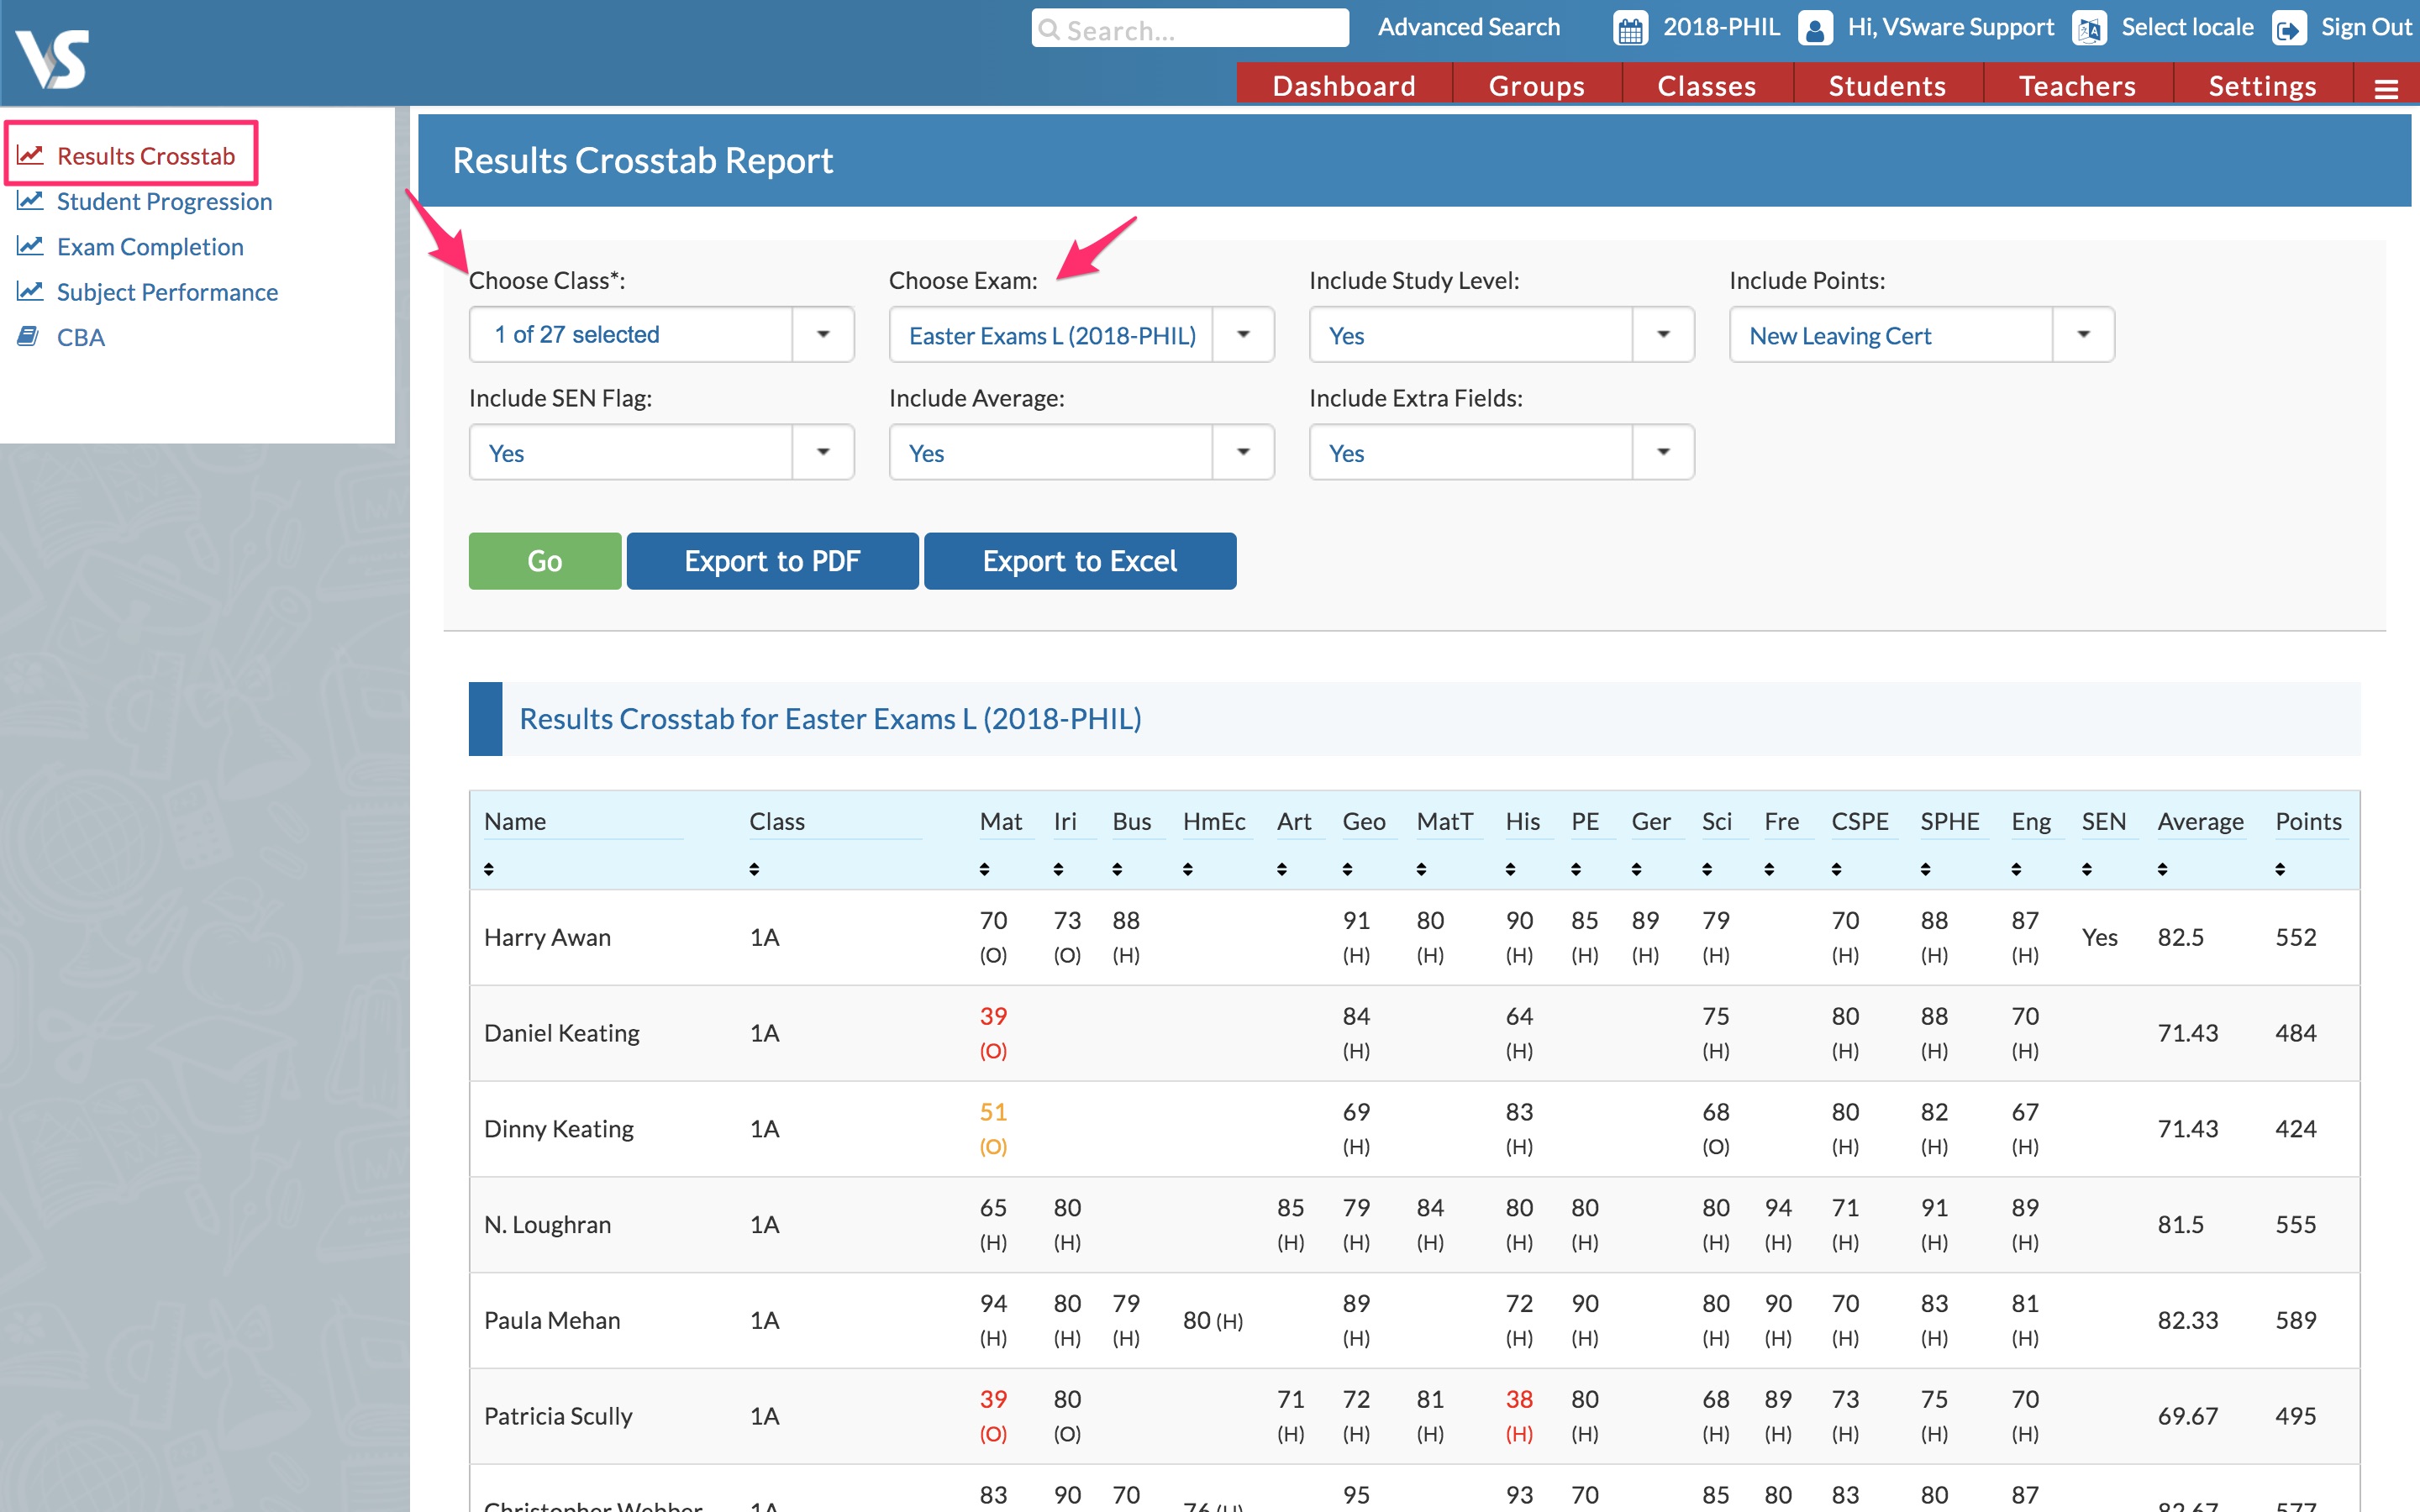
To access the Results Crosstab, click the three lines on the top right of the screen > Assessment > Results Crosstab.
On the top of this screen, there are a number of filters you can apply.
Choose Class allows you to pick one class at a time.
Chose Exam also allows just one exam to be selected at a time.
You also have the option to display the Study Level, Include Points (this is calculates the Leaving Cert or New Leaving Cert points for you in the last column of the table), SEN flag if applicable, Average Score and Extra Fields if they were applied during the exam setup.
This report can be viewed in the browser, or exported as a PDF or Excel file.
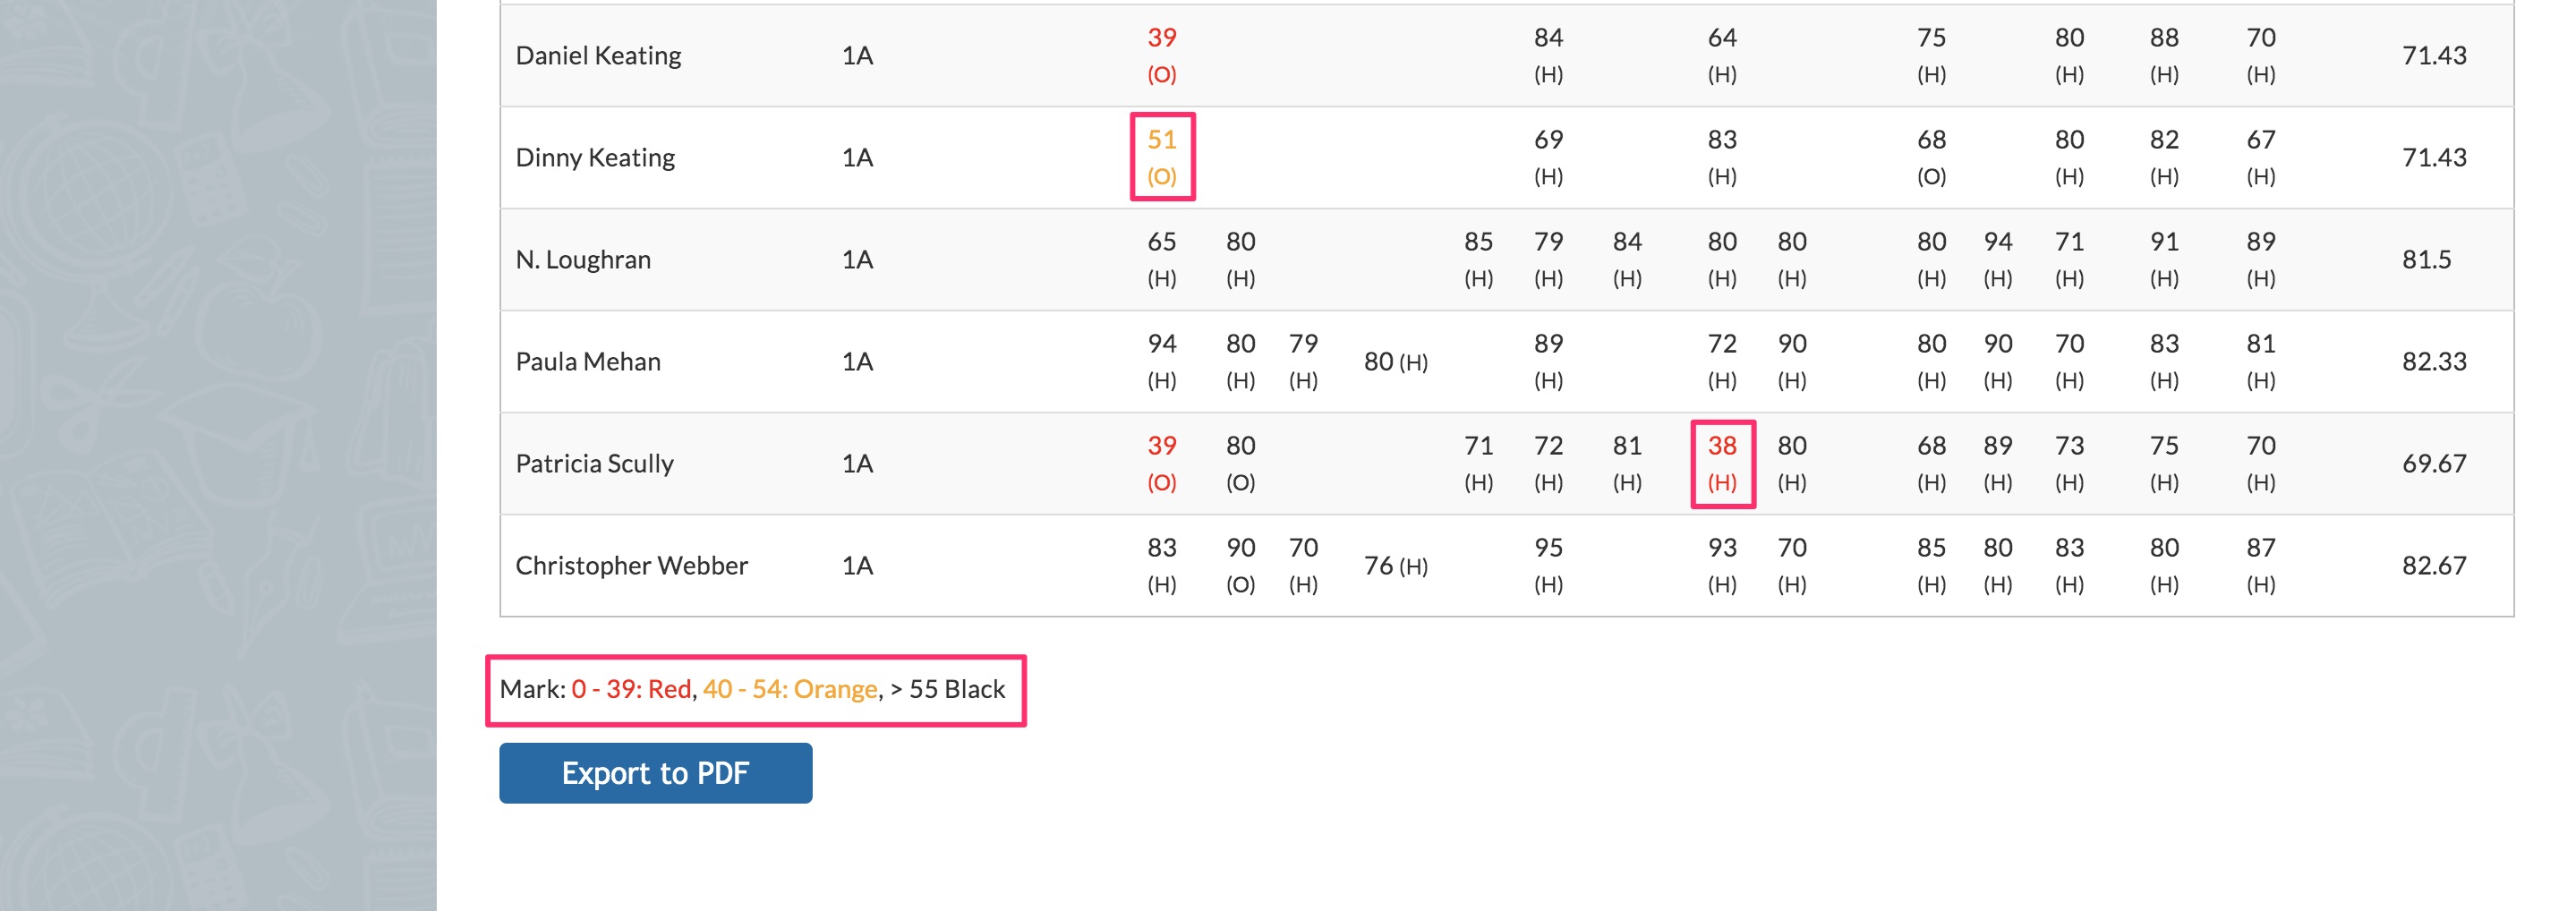
To make it easier to track when a student is falling behind with their results, they are colour coded according to the mark. Marks of 39 or below appear in red, marks between 40 - 54 are orange and 55 and above are black. The index is shown at the bottom of the report.
Student Progression Report
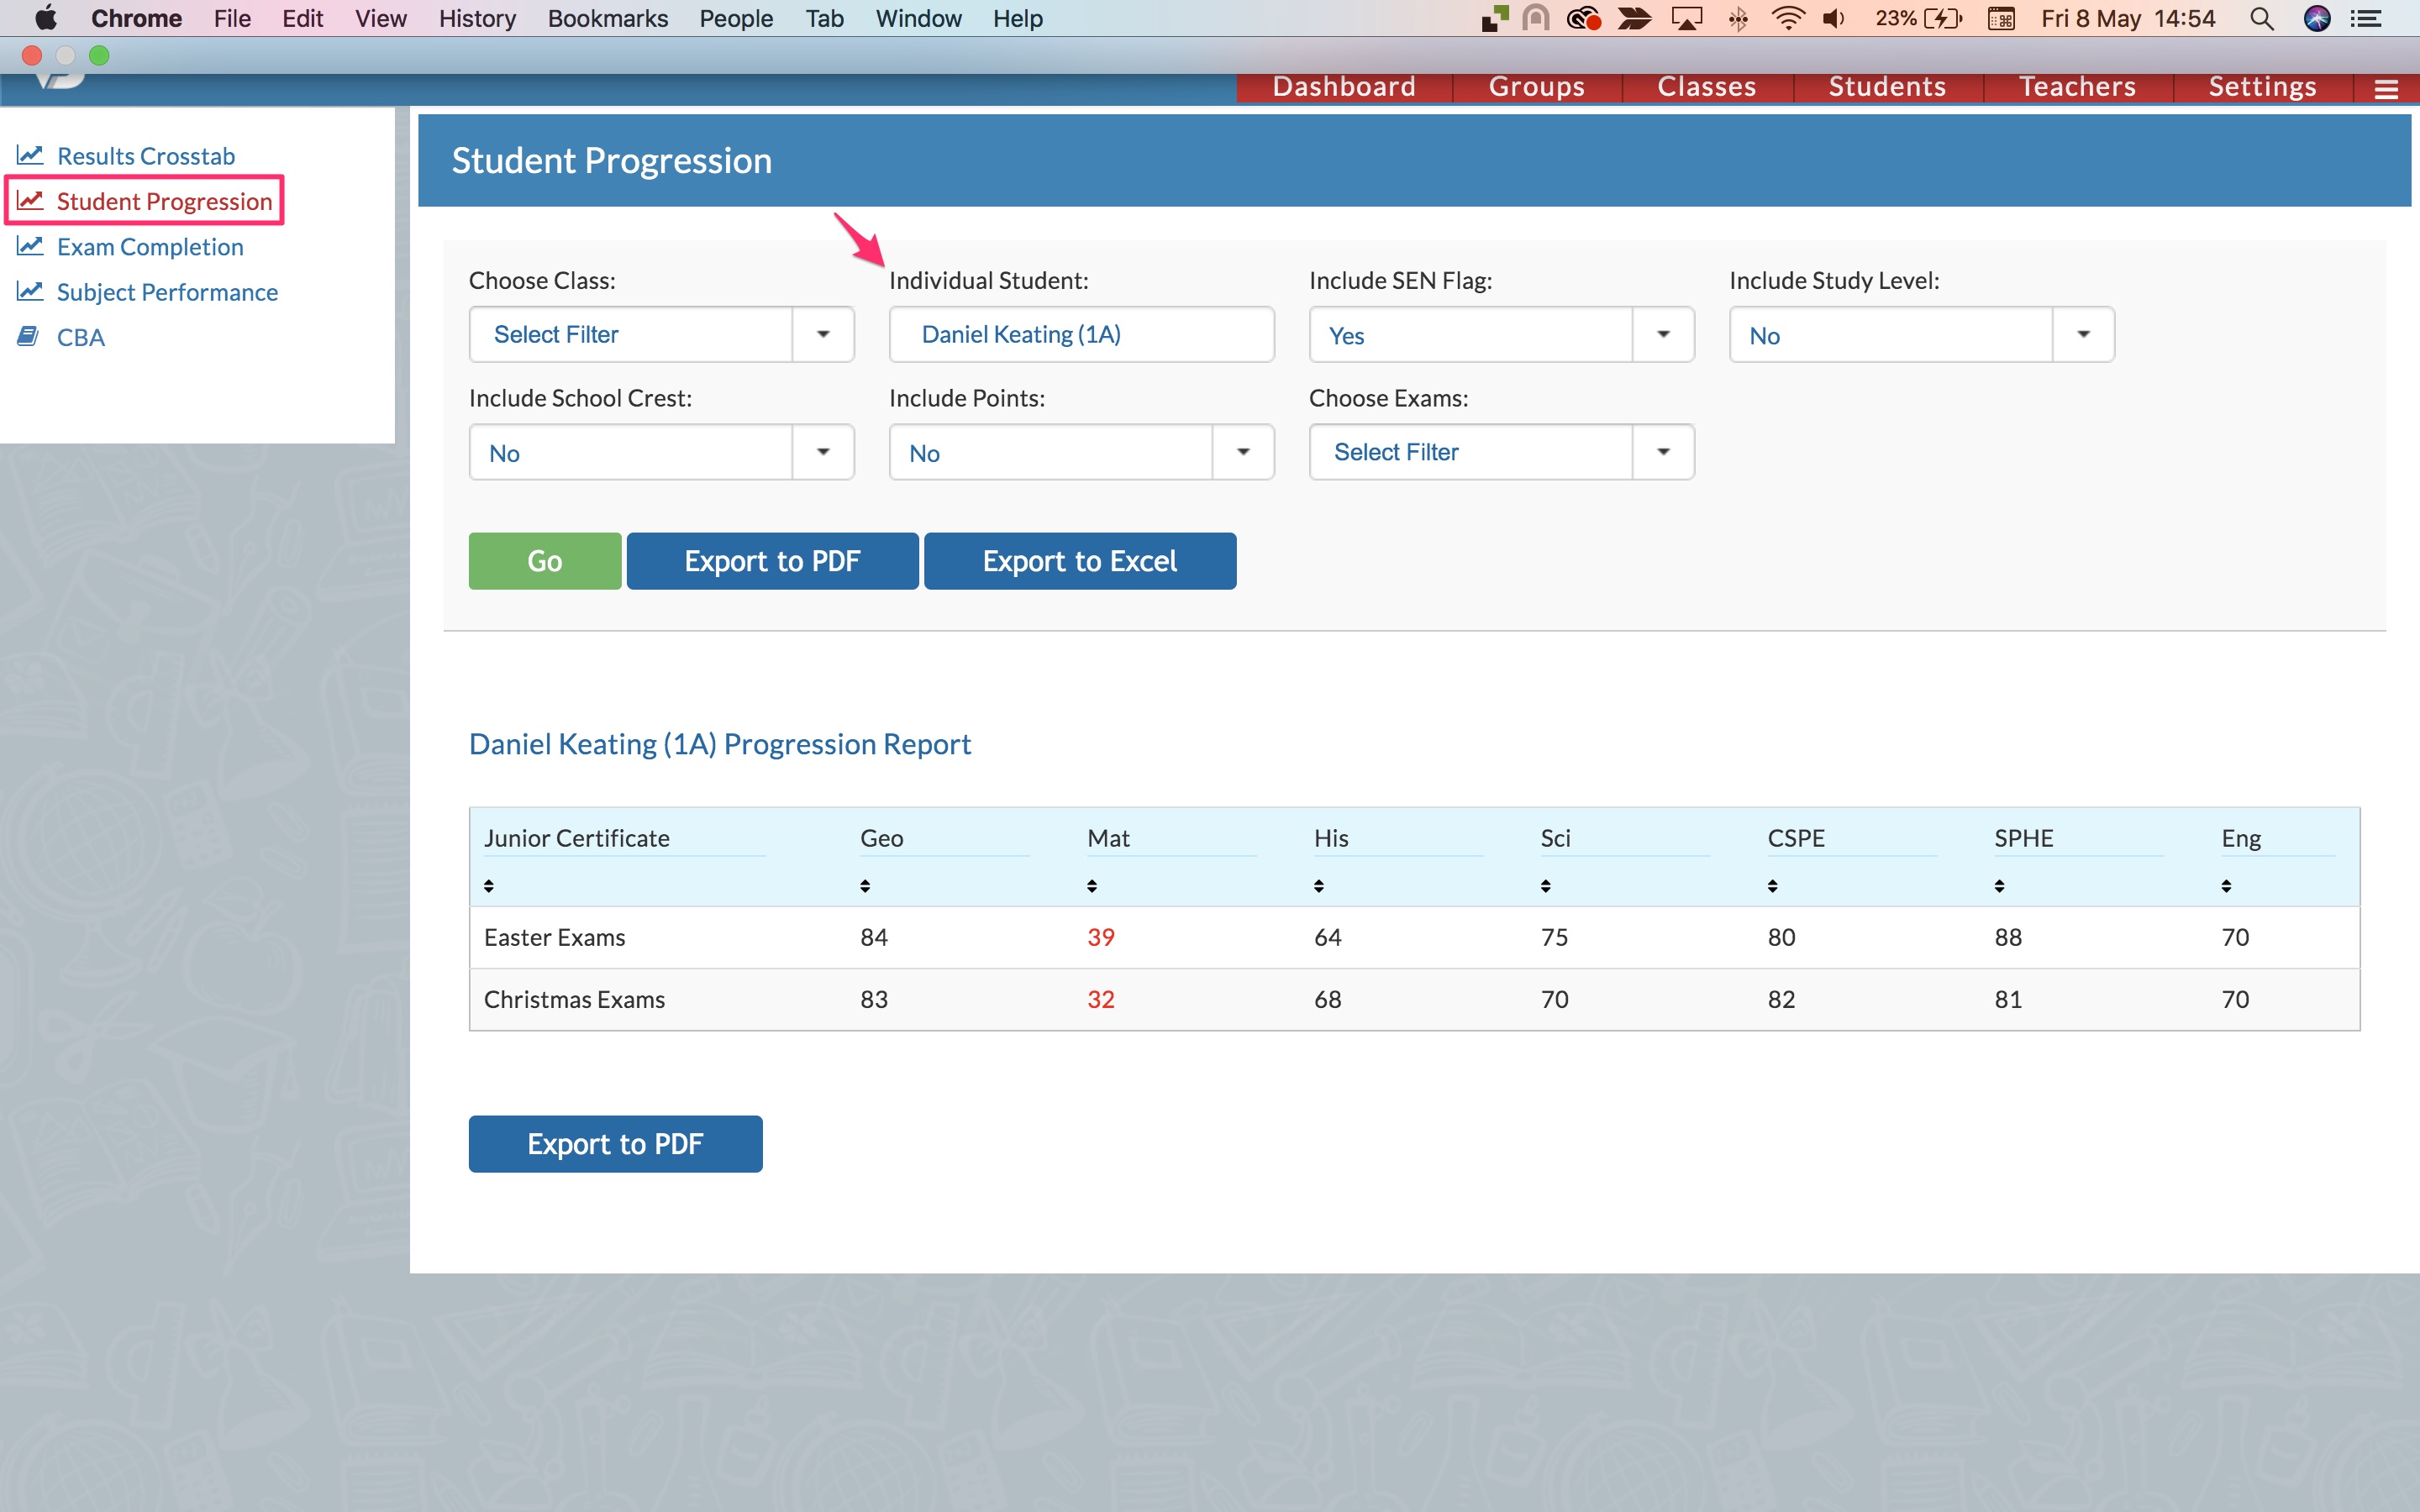
The Student Progression Report works in a different way to the Results Crosstab. It allows you to select an entire class or an individual student while also selecting multiple exams so you can view how a student is progressing with their marks over time.
To access the Student Progression Report, click the three lines on the top right of the screen > Assessment > Student Progression Report.
On the top of this screen, there are a number of filters you can apply.
Choose Class allows you to pick multiple classes at once.
Individual Student is where you can type in the name of a student. Make sure you select their name from the dropdown list when it appears.
You also have the option to display the SEN Flag, Study Level, School Crest (useful if you want to download the PDF and send to a parent) and Include Points.
Chose Exam allows you to select multiple exams to compare.
This report can be viewed in the browser, or exported as a PDF or Excel file.
Giving teachers access to these reports
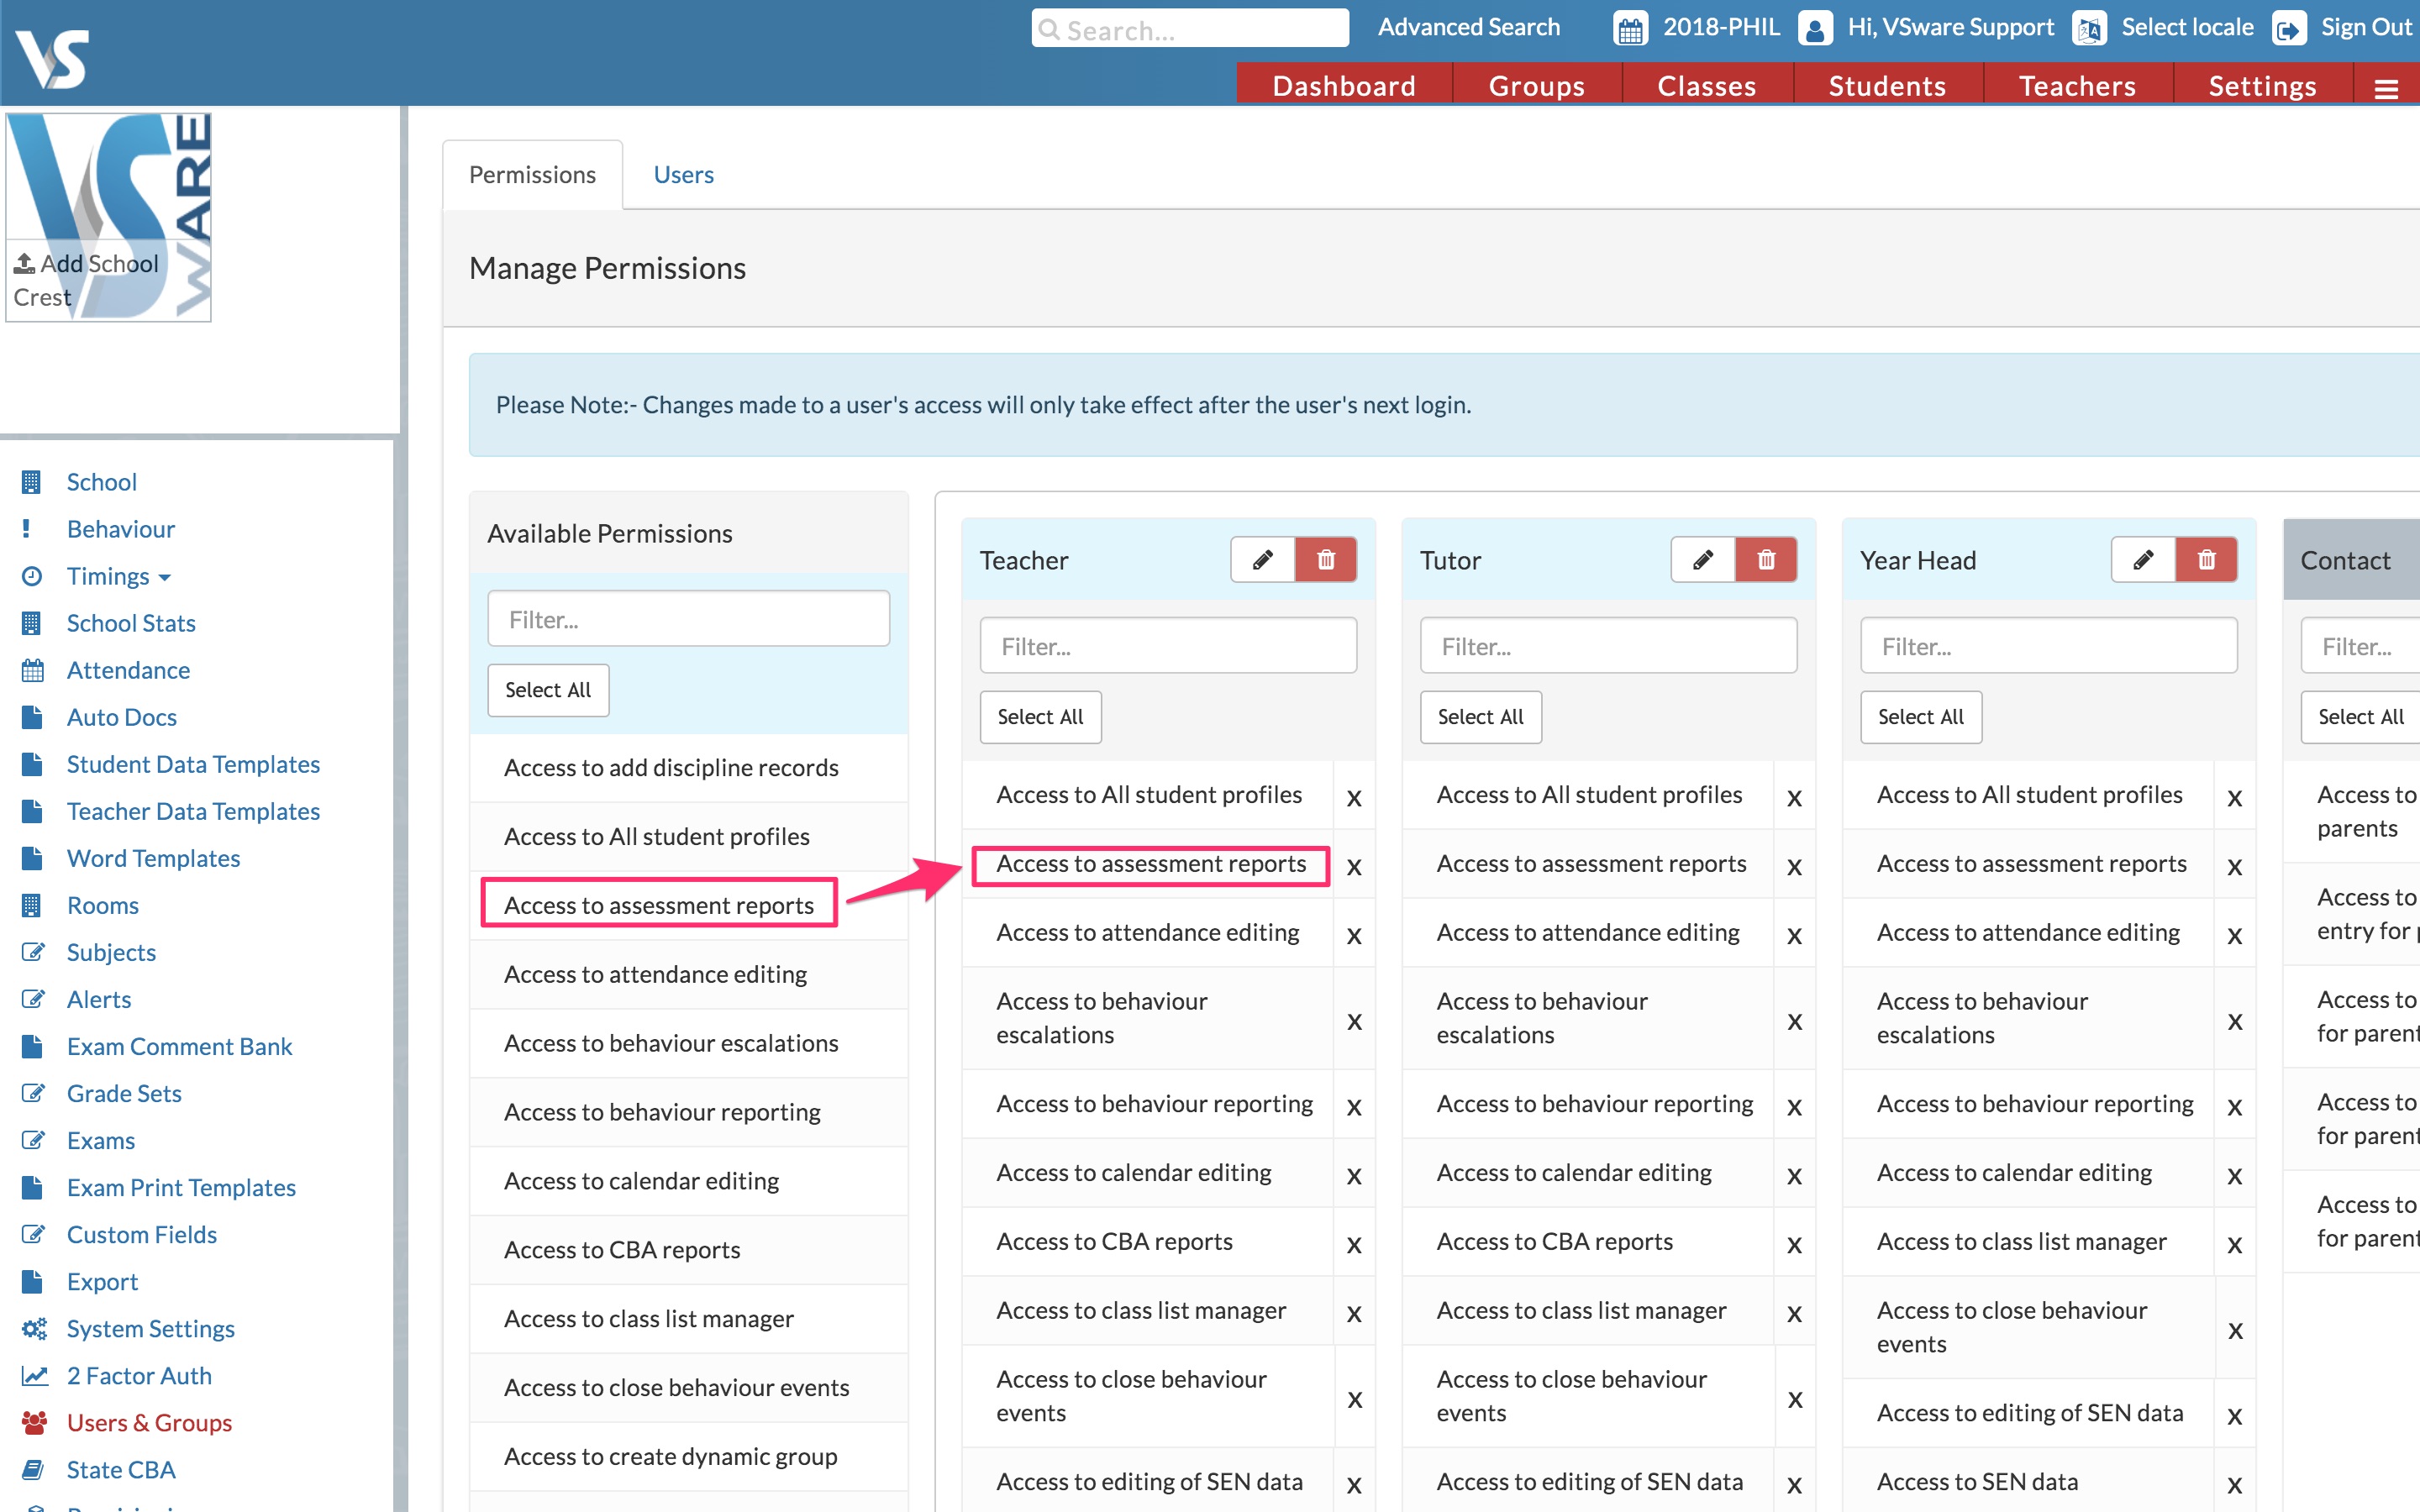
If you want to allow all teachers to access and download these reports, go to Settings > Users & Groups > Permissions. Search in the filter bar on the left in Available Permissions for 'Access to Assessment reports' > drag and drop this permission into the 'Teacher' column.
The next time a teacher logs in, they will have access to the 'Assessment Tab'.
If you would like only certain teachers to have access to this tab, you would have to set up a new user group, apply the usual teacher permissions, plus this additional assessment permission - then move the relevant teachers into that group. More info on how that's done can be found here.
Please note that the teacher will be able to see the results of a student they do not teach if you do this. They do not need the 'Allow access to all student profiles' permission in order to see all results.